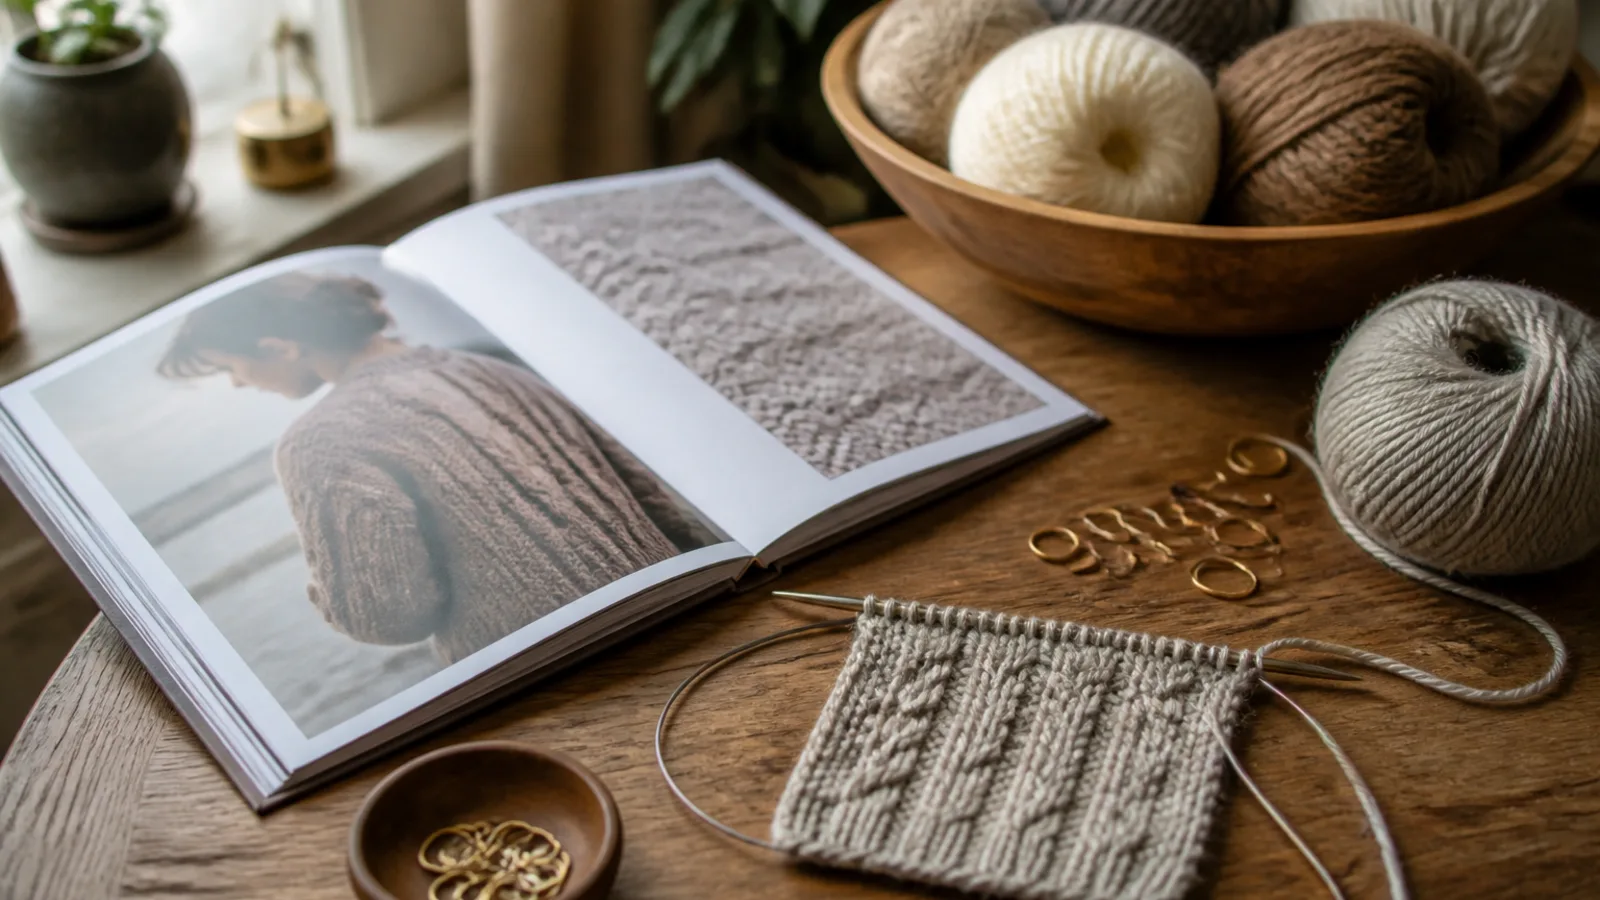
You can know how to knit and purl and still freeze when a pattern says, “Rep Rows 1–4 until work measures 18 cm, ending after a WS row.” Learning how to read a knitting pattern is less about memorising every abbreviation and more about understanding how the instructions are organised.
This guide is your plain-English decoder for abbreviations, gauge, sizing, repeats, charts, US and UK terminology, and needle-size conversions. We’ll also walk through a short sample pattern line by line so you can see how the pieces fit together.
How to Read a Knitting Pattern: What to Check Before You Cast On
A knitting pattern is not just a row-by-row script. It is a plan for the finished object: its size, fabric, shape, techniques, and finishing details.
Most patterns include some version of these sections:
- Project overview: what you are making and how it is constructed.
- Skill level: a rough guide to difficulty.
- Finished measurements: the size after knitting and blocking.
- Yarn requirements: yarn weight, fibre, and amount.
- Needles: suggested needle size and type.
- Gauge or tension: stitches and rows over a measured area.
- Notions: stitch markers, tapestry needle, buttons, waste yarn, or other extras.
- Abbreviations: shorthand used in the instructions.
- Written instructions or charts: the making steps.
- Finishing: seaming, blocking, weaving in ends, and final details.
Before buying yarn or casting on, read the whole pattern once. You do not need to understand every line immediately, but you do want to spot anything that affects your size, yarn choice, tools, or confidence level.
The First Things to Check
Skill level
Labels such as beginner, easy, intermediate, and advanced are helpful, but they are not universal. One designer’s “easy” sweater might include shaping and seaming, while another’s “intermediate” shawl may simply require careful repeat tracking.
Look for the actual techniques: increases, decreases, knitting in the round, short rows, cables, lace, colourwork, picking up stitches, or seams. If one technique is new, that does not mean you cannot make the project. It means you should practise that step on a swatch before you reach it.
Size and finished measurements
For garments, finished measurements matter more than the size name. A “medium” in one pattern may not match a “medium” in another.
Patterns usually list the finished garment measurements, not just body measurements. This includes ease, which is the difference between your body measurement and the garment measurement.
- Positive ease: the garment is larger than your body.
- Negative ease: the garment is smaller than your body, common in fitted knits.
- Zero ease: the garment is close to your body measurement.
For example, if your bust is 38 in / 96.5 cm and the sweater’s finished bust is 42 in / 106.5 cm, the sweater has about 4 in / 10 cm of positive ease. A practical way to choose is to measure a sweater you already like and compare it with the pattern’s finished measurements.
Yarn, yardage, and substitution
The yarn section tells you the recommended yarn, weight, fibre content, and amount needed. If you substitute yarn, compare more than the weight category. Fibre affects drape, warmth, stretch, stitch definition, and blocking.
Yarn weight names vary by country, so use the pattern’s gauge as your final check. Common comparisons include:
- Fingering, sock, or 4-ply: often used for socks, shawls, and lightweight garments.
- Sport or 5-ply: slightly heavier than fingering, though naming varies.
- DK or 8-ply: a popular midweight yarn for garments and accessories.
- Worsted, Aran, or 10-ply: often used for sweaters, blankets, and winter accessories.
- Chunky, bulky, or 12-ply: heavier yarn for quick, warm projects.
- Super chunky, super bulky, or 14-ply and above: very thick yarns, often used with large needles.
These names are useful guides, not perfect substitutes. Yardage and metreage can vary even within the same yarn weight. Buy enough for your size, and if possible, use the same dye lot so the colour is consistent.
Needles
The needle size in a pattern is a starting point, not a rule. Your goal is to achieve the stated gauge. If your stitches are naturally tight, you may need a larger needle. If they are loose, you may need a smaller one.
Also check the needle type. A pattern may call for straight needles, circular needles, double-pointed needles, or a long circular needle for magic loop. If a fitted project is knitted in the round, swatch in the round too.
Common Knitting Abbreviations Explained
Knitting patterns use abbreviations to keep instructions concise. Always check the pattern’s own abbreviation list first, because designers sometimes define special stitches differently.
- k: knit
- p: purl
- st / sts: stitch / stitches
- RS: right side, the public-facing side
- WS: wrong side, the inside or less visible side
- CO: cast on
- BO: bind off, also called cast off
- rep: repeat
- rem: remaining
- beg: beginning
- inc: increase
- dec: decrease
- tog: together
- yo: yarn over
- sl: slip
- psso: pass slipped stitch over
- tbl: through back loop
- pm: place marker
- sm: slip marker
- M1: make one increase
- k2tog: knit two stitches together
- ssk: slip, slip, knit
- p2tog: purl two stitches together
Read abbreviations from left to right. “K2” means knit two stitches, not knit stitch number two. “P to end” means purl every remaining stitch across the row or round.
Example: “Row 1: K2, p4, k2.” In plain English, knit 2 stitches, purl 4 stitches, then knit 2 stitches.
Pattern Terms That Often Confuse Beginners
- Turn: turn your work around and work back in the other direction.
- Work even: continue without increasing or decreasing.
- As established: keep following the stitch pattern already set up.
- At the same time: work two sets of instructions during the same section, not one after the other.
- End with a WS row: the last row you complete should be a wrong-side row.
- Pick up and knit: create new stitches along an existing edge.
- Join to work in the round: connect your cast-on stitches into a circle without twisting them.
- Block: use moisture or steam, depending on the fibre, to even out and shape the finished knitting.
- Reverse shaping: work shaping as a mirror image for the opposite side.
US and UK Knitting Terms, Yarn Names, and Needle Sizes
Most core knitting terms are similar across US, UK, Canadian, and Australian patterns. Still, regional differences can trip you up.
- Gauge is common in US patterns; tension is common in UK and Australian patterns. They mean the same thing.
- Bind off is common in US patterns; cast off is common in UK patterns. Both mean finishing stitches so they do not unravel.
- Measurements may be in inches, centimetres, or both.
- Needle sizes may be listed as US numbers, metric millimetres, or older UK and Canadian numbers.
Metric millimetres are the clearest way to compare needle sizes. Common conversions include:
- 2.0 mm = US 0 = old UK/Canadian 14
- 2.25 mm = US 1 = old UK/Canadian 13
- 2.75 mm = US 2 = old UK/Canadian 12
- 3.25 mm = US 3 = old UK/Canadian 10
- 3.5 mm = US 4 = no exact old UK/Canadian equivalent commonly used
- 3.75 mm = US 5 = old UK/Canadian 9
- 4.0 mm = US 6 = old UK/Canadian 8
- 4.5 mm = US 7 = old UK/Canadian 7
- 5.0 mm = US 8 = old UK/Canadian 6
- 5.5 mm = US 9 = old UK/Canadian 5
- 6.0 mm = US 10 = old UK/Canadian 4
- 6.5 mm = US 10.5 = old UK/Canadian 3
- 8.0 mm = US 11 = old UK/Canadian 0
- 9.0 mm = US 13 = old UK/Canadian 00
- 10.0 mm = US 15 = old UK/Canadian 000
Vintage UK and Canadian needle sizing runs in the opposite direction: smaller numbers mean larger needles. If a pattern gives metric sizes, use those as your anchor. For general yarn and needle standards, the Craft Yarn Council standards are a useful reference.
Gauge Swatches: What They Tell You
Gauge, or tension, tells you how many stitches and rows fit into a set measurement, often 4 in / 10 cm. It controls the finished size of your project.
If the pattern says “20 sts and 28 rows = 4 in / 10 cm in stockinette,” your swatch should have 20 stitches and 28 rows over that measurement after any washing or blocking recommended for the finished item.
To make a useful swatch:
- Use the yarn and needle size you plan to use.
- Work in the stitch pattern named in the gauge section.
- Make the swatch larger than 4 in / 10 cm so you can measure the centre.
- Wash and dry it the way you will treat the finished project.
- Measure the centre stitches and rows, away from the edges.
If you have too many stitches in 4 in / 10 cm, your stitches are smaller than the pattern’s gauge, so try a larger needle. If you have too few stitches, your stitches are larger, so try a smaller needle.
For scarves and dishcloths, gauge may be less critical. For sweaters, hats, socks, and fitted items, skipping it can change the size noticeably.
Repeats, Brackets, Asterisks, and Size Numbers
Repeats are one of the biggest reasons patterns look more complicated than they are. Once you learn the punctuation, they become much easier.
Asterisks
An asterisk marks the beginning of a repeated instruction.
Example: “K2, *p1, k3; rep from * to end.” Knit 2 stitches, then keep repeating purl 1, knit 3 until the row is finished.
Brackets and parentheses
Brackets often group instructions that should be repeated a set number of times.
Example: “[K2, p2] 5 times” means work knit 2, purl 2 a total of five times.
Parentheses are often used for size-specific numbers. For example, “CO 80 (88, 96, 104) sts” might correspond to S (M, L, XL). If you are making size L, cast on 96 stitches. Highlight your size throughout the pattern before you begin.
Shaping with multiple sizes
Garment patterns often combine size numbers with shaping intervals. Read only the number that belongs to your chosen size.
Example: “Dec 1 st at each end of next 2 (4, 4, 6) RS rows.” If your sizes are S (M, L, XL) and you are making M, you decrease at each end of the next 4 right-side rows.
Example: “Work even until armhole measures 7 (7.5, 8, 8.5) in.” If you are making XL, you continue without shaping until the armhole measures 8.5 in.
Stitch counts
A number at the end of a row often tells you how many stitches you should have after completing that row.
Example: “Row 5: K1, M1, k to last st, M1, k1 — 42 sts.” You increase by 2 stitches and should now have 42 stitches.
Use stitch markers to divide long rows into sections. It is much easier to find a mistake in a 20-stitch section than across an entire cardigan row.
Right Side, Wrong Side, Rows, and Rounds
The right side, or RS, is the side meant to show. The wrong side, or WS, is usually the inside. Even in reversible patterns, RS and WS still matter for shaping and stitch placement.
Rows are worked flat: you turn the work at the end of each row. Rounds are worked in a circle, usually on circular needles or double-pointed needles. This changes how some stitch patterns are made. Stockinette worked flat is knit one row, purl one row. Stockinette worked in the round is knit every round.
If a pattern says “ending with a WS row,” it means the last row you complete should be a wrong-side row. The next row you work will be a right-side row.
How to Read Knitting Charts
A chart is a visual map of your knitting. Each square represents a stitch, and each symbol tells you what to do. Always read the chart key before starting, because symbols are not identical in every pattern.
For flat knitting, right-side rows are usually read from right to left, and wrong-side rows are usually read from left to right. For knitting in the round, rounds are usually read from right to left. Always check the chart notes in case the designer specifies something different.
One beginner trap: symbols may mean different actions on right-side and wrong-side rows. A chart key might say a blank square means “knit on RS, purl on WS,” because the goal is to make the front of the fabric look consistent.
Charts often include a repeat box. You may work a few setup stitches, repeat the boxed section across the row, then work a few ending stitches. For lace, cables, and colourwork, charts can be easier to follow than written instructions because you can see the pattern developing visually.
Worked Example: Reading a Simple Pattern Line by Line
Here is a short sample pattern excerpt:
Finished size: approx. 6 in / 15 cm square after blocking.
Gauge: 18 sts and 24 rows = 4 in / 10 cm in garter stitch.
Needles: 5 mm / US 8.
Abbreviations: k = knit, yo = yarn over, k2tog = knit 2 together, rep = repeat.
CO 24 sts.
Rows 1–4: K all sts.
Row 5: K3, *yo, k2tog, k2; rep from * to last st, k1.
Row 6: K all sts.
Rep Rows 5–6 until piece measures approx. 5.5 in / 14 cm from CO edge, ending after Row 6.
Next 4 rows: K all sts.
BO all sts. Weave in ends and block.
Overview
The finished size tells you the target measurement after blocking. The gauge tells you what fabric the designer expects. The needle size is the suggested tool for reaching that gauge.
Cast on
“CO 24 sts” means cast on 24 stitches. Count them before you start Row 1. It is much easier to fix a cast-on count now than after several rows.
Rows 1–4
“K all sts” means knit every stitch. Four rows of garter stitch create a simple border.
Row 5
“K3” means knit 3 stitches. The asterisk marks the repeat: yarn over, knit 2 together, knit 2. You repeat that sequence until one stitch remains, then knit the last stitch.
The yarn over adds one stitch and creates a small eyelet. The k2tog decreases one stitch. Because one stitch is added and one is removed, the stitch count stays the same.
Row 6 and repeat
Row 6 is simple: knit every stitch. Then you keep alternating Rows 5 and 6 until the piece measures about 5.5 in / 14 cm from the cast-on edge. “Ending after Row 6” means your final repeat should finish with a plain knit row.
Finishing
Work four more knit rows for the final border, then bind off, also called casting off. Weave in the yarn tails and block the piece to even out the stitches.
How to Follow More Than One Instruction at Once
The phrase “at the same time” deserves special attention. It means two things are happening during the same rows.
Example: “Dec 1 st at neck edge every RS row 4 times, at the same time shape armhole as follows...”
In plain English, you do not finish all the neck shaping and then start the armhole shaping. You track both together. For shaping sections, make a simple row checklist with columns for row number, neck shaping, armhole shaping, and stitch count.
Common Mistakes When Reading Knitting Patterns
- Skipping the notes: Pattern notes often explain construction and exceptions.
- Ignoring gauge: This is risky for anything that needs to fit.
- Following the wrong size: Highlight your size before starting.
- Missing “at the same time”: Read ahead before shaping begins.
- Misreading repeats: Mark asterisks, brackets, and repeat boxes.
- Not checking stitch counts: Count after increase and decrease rows.
A Quick Checklist Before Starting
- Read the full pattern once.
- Highlight your size.
- Check finished measurements and ease.
- Review yarn weight, fibre, and amount.
- Check needle size and needle type.
- Make a gauge swatch if size matters.
- Read the abbreviation list.
- Look up unfamiliar techniques.
- Study any charts and chart keys.
- Mark repeats and shaping sections.
- Set up a row counter or project notes.
FAQ
What is the first thing I should read in a knitting pattern?
Start with the overview, finished measurements, gauge or tension, yarn requirements, and construction notes. Then read the row-by-row instructions. This helps you spot sizing, yarn, and technique issues before you cast on.
What does “rep from *” mean in knitting?
It means repeat the instructions beginning at the asterisk. For example, “K1, *p2, k2; rep from *” means knit 1, then keep repeating purl 2, knit 2 as directed.
Is gauge necessary for every knitting project?
Gauge matters most for projects that need to fit, such as sweaters, hats, socks, and mittens. For scarves, blankets, and dishcloths, it may be less critical, but it still affects finished size, drape, and yarn use.
Are US and UK knitting terms different?
Many knitting abbreviations are the same, but there are differences. US patterns often say gauge and bind off, while UK and Australian patterns may say tension and cast off. Needle-size systems also vary, so metric millimetres are the safest comparison.
How do I know which number to follow for my size?
Patterns usually list sizes in the same order throughout, such as S (M, L, XL). Choose your size using the finished measurements, then highlight the matching number everywhere it appears.
Conclusion
Once you understand the structure, abbreviations, and punctuation, learning how to read a knitting pattern becomes much less intimidating. Read the notes, choose your size from finished measurements, respect gauge when fit matters, and translate each instruction into one small action at a time. A pattern is not a test; it is a set of directions you can learn to follow with confidence.
Join the conversation
Sign in — Sign in to join the conversation.