
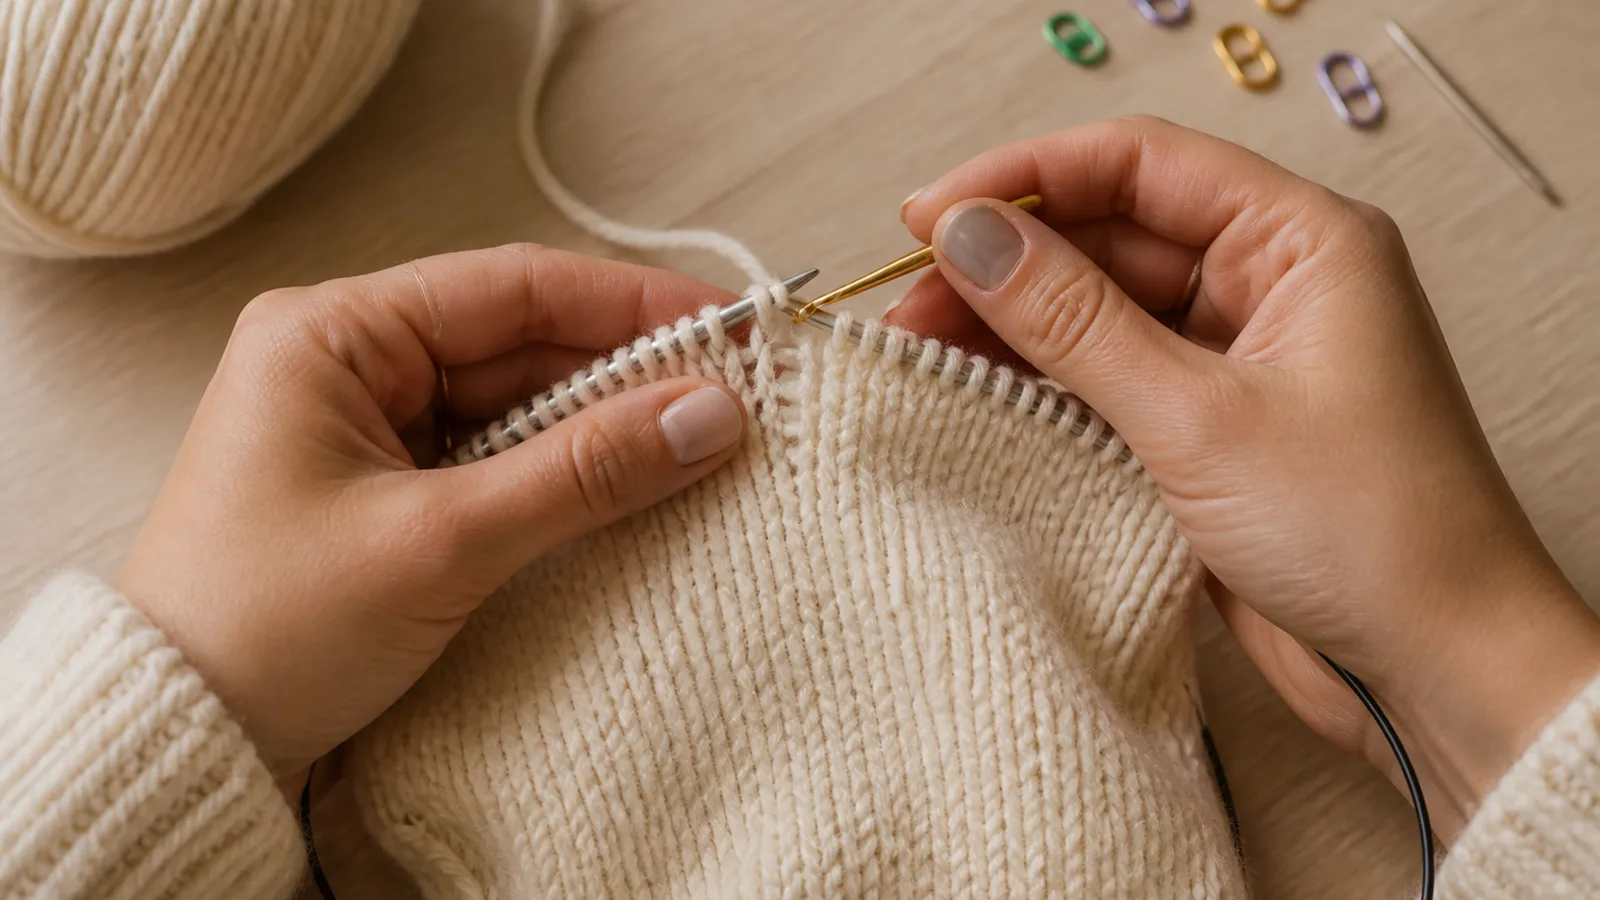
You're twenty rows into the back of a jumper when you see it: a ladder running down the middle. Or a small hole that wasn't there yesterday. Or a stitch count that is two short, with no idea where the stitches went. Learning how to fix knitting mistakes is mostly about learning to read what's in front of you. Almost every error can be put right, and many can be fixed without ripping out your work.
This guide is organised by symptom. Find what you're seeing, learn the likely cause, then follow the fix. Along the way you'll learn when to tink, when a lifeline will save you, when it's genuinely better to frog and restart, and when a small flaw is fine to leave exactly where it is.
Before You Fix Anything: Knitting First Aid
Stop knitting. Carrying on for “just one more row” usually makes the repair bigger. Then do three things.
- Secure any loose loop. Catch it with a locking stitch marker, a safety pin or a scrap of yarn so it can't run any further.
- Leave the needles in. Pulling them out to “see better” turns one problem into dozens of loose stitches.
- Find good light. Daylight or a bright lamp works best. A pale cloth under dark yarn makes the stitches much easier to read.
Your repair kit: a crochet hook the same size as your needle or slightly smaller, locking stitch markers, a tapestry needle, smooth waste yarn in a contrasting colour, and a spare needle a size or two smaller for picking stitches back up.
Read your knitting in 60 seconds
In stockinette (stocking stitch), a knit stitch looks like a V and a purl stitch looks like a horizontal bump. On the needle, each stitch has two legs. In standard Western knitting, the leading leg, the one nearest the needle tip, sits in front of the needle. That is all the vocabulary you need to diagnose most problems. If the basics still feel shaky, our beginner's knitting guide covers them in more depth.
How to Fix Knitting Mistakes: Start With What You See
Scan this list for your symptom, take the first step, then head to the matching section below.
- A loose loop under a ladder of horizontal bars. Cause: a dropped stitch. First move: pin the loop, then go to Dropped Stitches.
- A neat round hole, and one stitch too many. Cause: an accidental yarn over. First move: count your stitches, then go to Holes and Accidental Extra Stitches.
- A hole, but the stitch count is correct. Cause: loose tension, a rescued dropped stitch, or a gap where needles meet when knitting in the round. First move: check whether it lines up with a needle change.
- A stitch whose legs cross at the base, like a small X. Cause: a twisted stitch. Go to Twisted Stitches.
- Fabric getting wider, or extra stitches at the edges. Cause: yarn overs, knitting into the bar between stitches, or a doubled edge stitch.
- Fabric getting narrower, or too few stitches. Cause: a dropped stitch or an accidental knit-two-together. Look for a ladder before anything else.
- A purl bump among knits, or a V among purls. Cause: a wrong stitch a few rows down. Go to The Wrong Stitch a Few Rows Down.
- Matching pieces of different lengths, or shaping in the wrong place. Cause: miscounted rows.
Dropped Stitches
A dropped stitch leaves a ladder of horizontal strands, often with a loose loop at the bottom, and your count is one short. It looks alarming, but it is one of the easiest mistakes to fix.
Fix one on the row you're working
- Use the needle tip or a crochet hook to lift the loop back onto the left needle.
- If a single strand sits above it, lift the loop over that strand so it becomes a proper stitch.
- Check that the leading leg sits in front of the needle, then work it as normal.
How to ladder up a dropped stitch with a crochet hook
- Turn the work so the knit side faces you.
- Insert the hook through the live loop from front to back.
- Catch the lowest horizontal bar, which sits behind the loop.
- Pull the bar through the loop towards you. You now have a new loop on the hook.
- Repeat with the next bar up. Always work from the bottom rung upward and never skip one.
- Place the final loop on the left needle with the leading leg in front.
If a rung looks tangled or twisted, stop and untangle it with the hook before you carry on.
Laddering up on the purl side and in garter stitch
In stockinette, the simplest route is to turn the work so you always fix from the knit side. When you need a purl stitch facing you, reverse the movement:
- Insert the hook through the live loop from back to front, so the hook points towards you.
- Make sure the rung lies in front of the loop.
- Catch the rung and pull it through the loop to the back.
Garter stitch alternates. Viewed from one side, each column runs V, bump, V, bump. Check the neighbouring columns: where they show a bump, work that rung purl-style, and where they show a V, work it knit-style. Take the hook out and reinsert it from the correct direction each time. It is slower, but you won't need to flip the work for every rung.
When the stitch dropped many rows down
Say you find a dropped stitch eight rows down on the body of a stockinette jumper. Pin it, then ladder up exactly as above, one rung at a time. The rungs may feel tight because the neighbouring stitches have borrowed some of their yarn. Work gently. Afterwards, check both sides of the fabric. A slightly loose or tight column usually evens out with washing and blocking.
Ribbing, lace and cables
In ribbing, work out whether the dropped stitch belongs to a knit column or a purl column, and rebuild it to match. Lace and cables are harder, because the lost stitch may have been part of a decrease, a yarn over or a crossing. If the repair stops making sense, ripping back to a lifeline is often the kinder option.
Holes and Accidental Extra Stitches
The accidental yarn over
A neat eyelet and an extra stitch usually mean the yarn travelled over the needle as you switched between knit and purl. This is common in ribbing and seed (moss) stitch.
If you spot it on the next row:
- Work to the extra loop.
- Check that it's a loose strand, not a real stitch from the row below.
- Drop it off the needle.
- Ease the slack into the neighbouring stitches with your needle tip.
If it's several rows down, for example a 2x2 rib cuff that has gained a stitch and shows an eyelet three rows below, you have two options:
- Remove it. Drop the extra column down to the yarn over and let it unravel completely. The loose yarn sits as strands between the neighbouring columns. Work that slack into nearby stitches with a tapestry needle, and blocking will help it settle.
- Compensate. Where it won't show, decrease one stitch discreetly on the next row. Expect a tiny pucker.
The doubled edge stitch
Fabric that slowly grows wider at the edges is often caused by the first stitch of the row. When you turn the work and pull the working yarn up and over the needle, the first stitch gets dragged up and looks like two loops. Knit both, and you've added a stitch. The fix is to let the working yarn hang down below the needle when you start a row, and to glance at the first stitch before knitting it. If it has already happened, tink back to the edge.
Holes with no extra stitch
- Loose stitch after a rescue: use a tapestry needle to nudge the slack across several neighbouring stitches.
- Gaps where needles meet in the round: on double-pointed needles or magic loop, tug the first two stitches on each new needle snug, or shift the join a few stitches every few rounds.
- Gaps at short rows or pick-up corners: close them with the yarn tail as you weave in ends.
Twisted Stitches
A twisted stitch has legs that cross at the base, and the column may look tighter or slanted. On the needle, its leading leg sits behind the needle instead of in front. Common causes include wrapping the yarn the other way on purl rows and putting stitches back on the needle backwards after tinking or frogging.
On the needle: knit (or purl) the stitch through the back loop. With a backwards-seated stitch, this produces an untwisted stitch. You can also lift it off, turn it around and slip it back with the leading leg in front.
Rows below: ladder that single column down to the twisted stitch and rebuild it correctly with the hook. A lone twisted stitch in plain stockinette is often hard to spot once the piece is blocked, so you may decide to leave it.
When it isn't a mistake: combination knitters and some Eastern European styles seat stitches differently on purpose. If your fabric looks even, it may simply be your style. Twisted rib, worked through the back loop, is also intentional.
The Wrong Stitch a Few Rows Down: How to Ladder Down
A purl bump in smooth knit fabric doesn't mean ripping back every stitch. You can drop just one column on purpose.
- Work to the stitch directly above the error.
- Drop it off the needle and secure it with a marker if needed.
- Let it ladder down to just below the mistake.
- Rebuild the column with the crochet hook, working each rung knit-style or purl-style as the pattern requires.
- Return the final loop to the needle and continue.
The same principle can fix a cable crossed the wrong way, but it involves dropping several stitches and re-crossing them. Try it on a swatch before you attempt it on a favourite cardigan.
Miscounted Rows
How to count rows accurately
- Stockinette: count the Vs in one column.
- Garter stitch: each ridge equals two rows.
- Start and stop: count from just above the cast-on, and don't count the stitches on the needle.
Choosing the fix
Say you finish the second sleeve and it is three rows longer than the first. You can add rows to the first sleeve if the extra length doesn't matter, undo the bind-off and remove rows from the second, or rip back if the shaping no longer matches. Where increases or decreases are out of step, ripping back is usually the right call, because fit and symmetry depend on them.
Small differences behave differently depending on the fibre. Wool and alpaca have natural elasticity, so a row or two can often be eased into a seam or evened out when blocking. Cotton, linen, silk and many slick synthetics have far less give. With these yarns, plan to match row counts exactly before seaming.
To prevent repeats, use a row counter, place a removable marker every ten rows, keep tally marks on your pattern, or knit both sleeves at the same time. Our pattern-reading guide has more on tracking repeats and charts.
Tinking: Undoing Stitch by Stitch
“Tink” is “knit” spelled backwards. It means undoing one stitch at a time, and it is best for mistakes on the current row or the one or two before it.
- Insert the left needle, front to back, into the stitch below the first stitch on the right needle.
- Slide the upper stitch off the right needle.
- Gently pull the working yarn free.
- Repeat until you reach the mistake.
For purl stitches, the method is the same with the working yarn held in front. Check the orientation of each returned stitch, because hurried tinking is a common source of twisted stitches.
Lifelines: Your Safety Net
A lifeline is a strand of smooth waste yarn threaded through a row of stitches. If you need to rip back, the unravelling stops at that row.
Adding a lifeline as you knit
- Thread a tapestry needle with smooth, contrasting waste yarn. Mercerised cotton or plain unwaxed, unflavoured dental floss both work well.
- Pass it through every live stitch on the needle, skipping your stitch markers.
- Leave long tails at both ends.
Some interchangeable needle sets have a small hole in the connector, so you can thread a lifeline and simply knit the row. Add lifelines before lace, cable charts, complicated shaping, or at regular intervals in long projects. Avoid fuzzy or sticky yarns, which cling to your working yarn.
The afterthought lifeline
Forgot to add one? You can thread a lifeline through stitches you've already knitted. Pick one row below the mistake and guide the tapestry needle through the same leg of each stitch in that row, following it carefully across. Going slowly here saves real frustration later.
Ripping back to a lifeline
- Pull the needle out and unravel down to the lifeline.
- Slide the stitches onto a smaller needle, checking that each one is seated correctly.
- Knit the next row with your usual needle size.
Frogging: When to Rip It Out and Start Again
Frogging, from “rip it, rip it”, means pulling the needle out and unravelling rows quickly. It is usually the right call when:
- your tension (gauge) is far from the pattern's
- the fit is clearly wrong
- there are mistakes in several places
- a lace or cable error can't be fixed by dropping down
- the mistake will bother you every time you wear the piece
To stay in control, unravel to one row above your target, then tink the last row. Or pick up the stitches with a smaller needle first. Go slowly with slippery yarns such as silk, which ladder easily, and fluffy ones such as mohair, which grab and resist unravelling.
Frogged yarn is often kinky. For wool, wind it into a loose skein, tie it loosely in a few places, soak it in lukewarm water without agitating, then hang it to dry without weights. For acrylic and other synthetics, avoid steam and heat, which can permanently flatten the fibre. Wind it loosely and let it rest, or knit with it as is, since mild kinks often relax in the fabric. Frogging isn't failure. Nothing is wasted, and the second attempt is almost always better.
When It's Fine to Leave a Mistake In
A mistake can usually stay if it doesn't affect the stitch count or structure, and it sits somewhere that won't be seen, such as an underarm, the inside of a folded brim or within a busy texture. Minor uneven tension often disappears with blocking.
It's not fine to leave an unsecured dropped stitch, which can run with wear. Leave a mistake alone only if it doesn't affect shaping, the pattern or fit.
Try the viewing-distance test: if you can't spot the mistake when the piece is worn or lying on a table, it probably doesn't need fixing.
Small cover-ups help too. Duplicate stitch can hide a wrong colour in colourwork, and a discreet stitch on the wrong side can secure a loose loop while you weave in ends. A handmade piece is allowed to look handmade.
Small Habits That Prevent Most Mistakes
- Count stitches at the end of each pattern repeat.
- Place markers between repeats so errors are caught within a few stitches.
- Add lifelines before tricky sections.
- Knit complicated parts when you're alert, not at the end of a long day.
- Read the row below as you go.
For unfamiliar terms, the Craft Yarn Council's list of knitting abbreviations is a reliable reference.
FAQ
Can you fix a dropped stitch many rows down without ripping out your knitting?
Yes, in most plain fabrics. Secure the loop, then ladder up with a crochet hook one rung at a time, starting from the bottom. Washing and blocking will help even out the tension afterwards. In lace or cables, ripping back to a lifeline is often easier and neater.
What's the difference between tinking and frogging?
Tinking undoes one stitch at a time. It is slow but controlled, so it suits small, recent mistakes. Frogging means pulling the needle out and unravelling rows quickly. It is faster for bigger problems, but you need to pick the stitches back up carefully.
How do I know if my stitches are twisted?
The legs cross at the base of the V instead of sitting open, and the column may look tight or slanted. On the needle, the leading leg sits behind rather than in front. Some knitting styles seat stitches differently on purpose, so even fabric may simply reflect your style.
Will blocking fix holes or uneven stitches?
Blocking evens out minor tension differences and slightly loose stitches, especially in wool. It won't close a true hole from a dropped stitch or yarn over, and it won't correct a wrong stitch count.
Why does my knitting keep getting wider?
Usually because you're adding stitches by accident. The common causes are yarn overs when switching between knit and purl, knitting into the bar between stitches, and knitting a doubled edge stitch after turning. Regular counting and a quick glance at the first stitch of each row will catch most of these.
The Calm Way Forward
The real secret to how to fix knitting mistakes is to diagnose before you act. A ladder needs a crochet hook. A recent slip needs tinking. A tricky section deserves a lifeline. A problem with fit or the pattern may be asking you to frog and knit that section again. Secure anything that can unravel, correct anything that affects fit or structure, and let the rest become part of the quiet character of something you made yourself.
Join the conversation
Sign in — Sign in to join the conversation.