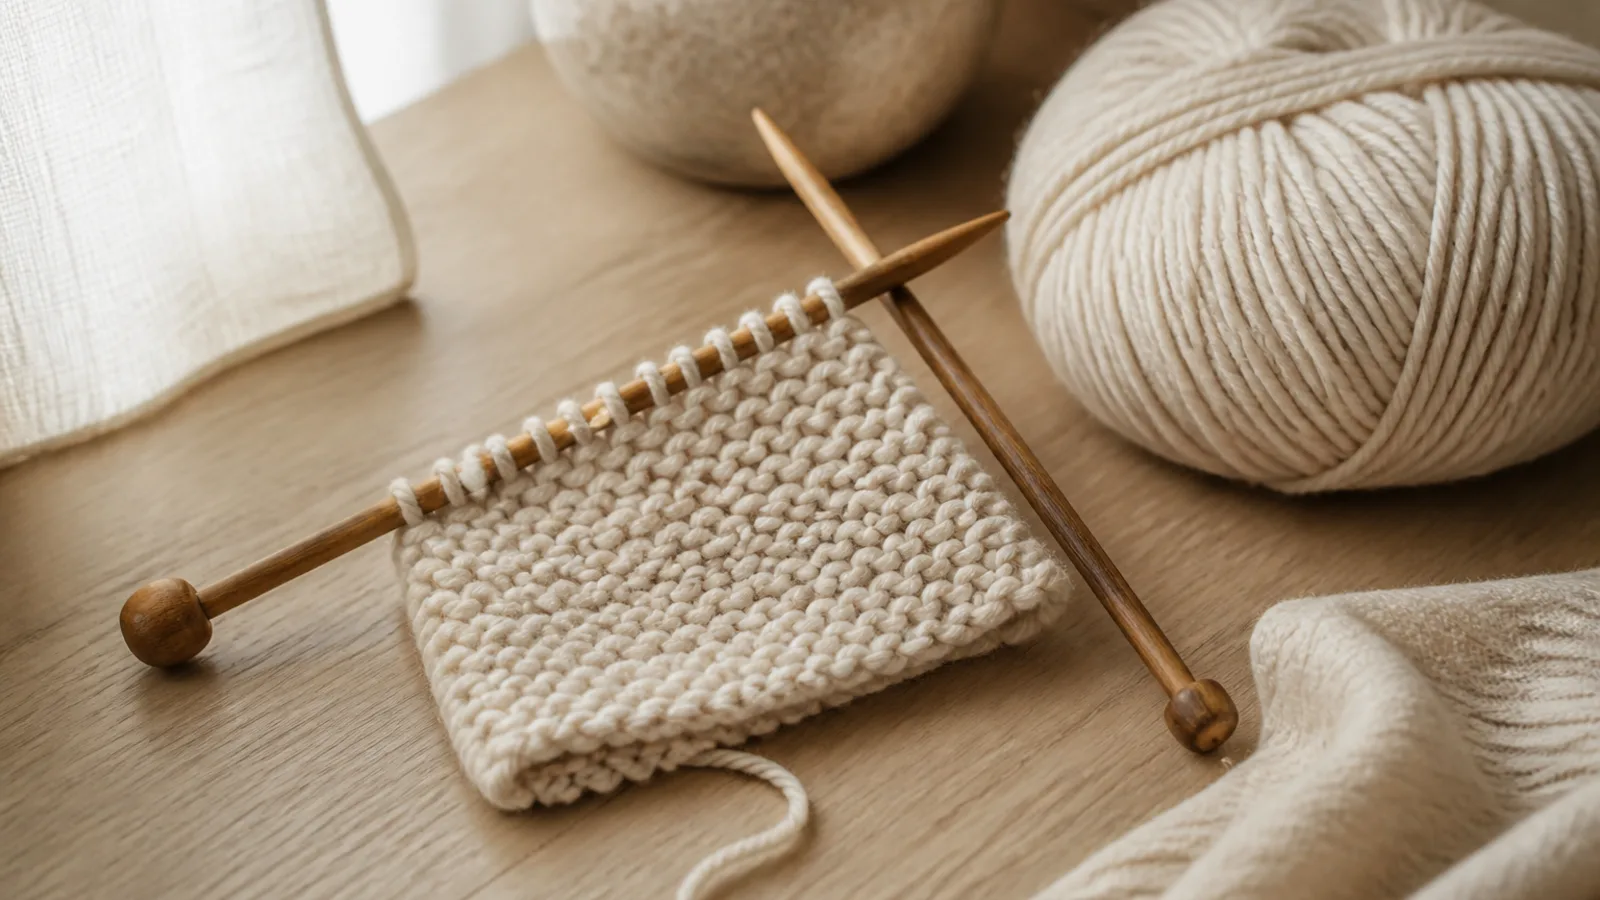
Learning to knit is not about being naturally crafty. It is about learning a few small movements in the right order, then repeating them until your hands stop feeling awkward. If you are searching for how to knit for beginners, start here: choose friendly yarn, cast on, make the knit stitch, learn purl when you are ready, bind off, and expect the first rows to look a little uneven.
That unevenness is not failure. It is your hands figuring out tension, rhythm and where the yarn needs to sit. This guide walks you through the basics calmly, including English and continental knitting styles, the long-tail cast on, fixing dropped stitches and a simple first project you can actually finish.
Before You Start: What Knitting Actually Is
Knitting is the process of pulling loops of yarn through other loops. Each loop on your needle is a stitch. You work across a row, turn the work, then work back again.
The two basic stitches are the knit stitch and the purl stitch. Almost every beginner pattern is built from these two movements. Knit every row and you get garter stitch, a stretchy ridged fabric. Knit one row and purl the next and you get stockinette stitch, the smooth V-shaped fabric many people picture when they think of knitting.
Your hands may feel clumsy at first. You may drop stitches, split the yarn or hold everything too tightly. That is normal. Think of it like learning to write neatly: first you learn the motion, then the control comes with repetition.
What to Buy for Beginner Knitting
Best yarn for beginners
Choose a smooth, medium-weight yarn in a light or medium colour. You want to see each stitch clearly, so avoid black, navy, fuzzy, fluffy, slippery or novelty yarn for your first project.
In the US and Canada, look for worsted or medium weight yarn. In the UK and Australia, you may see similar yarn labelled aran or sometimes 10 ply, depending on the brand. Yarn categories vary a little by manufacturer, so the yarn band is always your best guide.
Wool or a wool blend is forgiving because it has natural stretch and grip. Acrylic can be budget-friendly and easy to wash. Cotton is useful for dishcloths, though it has less bounce, so it can feel a little harder on the hands. There is no perfect yarn for everyone; choose something smooth, visible and pleasant to touch.
For more on yarn weights, the Craft Yarn Council yarn weight system is a helpful reference.
Best needles for beginners
For many beginners, needles around 4.5 to 5.5 mm are comfortable with medium yarn, but the best guide is the yarn label. In US sizing, that is often around US 7 to 9. In the UK, Australia and many European patterns, metric millimetres are the clearest measurement. Older UK needle sizes run in the opposite direction, which can be confusing, so check the mm size stamped on the needle or use a needle gauge.
Bamboo or wooden needles are often easier at first because they grip the yarn slightly. Metal needles are smooth and quick, but stitches can slide off more easily when you are learning.
Straight needles are traditional and simple for flat pieces. Circular needles can also be used for flat knitting and may feel more comfortable because the weight of the project rests in your lap. Either is fine for a beginner dishcloth, scarflette or practice square.
Helpful extras
- Small scissors
- A tapestry needle for weaving in yarn ends
- A crochet hook for rescuing dropped stitches
- Stitch markers, optional but useful
- A notebook or phone note for counting rows
A good beginner shopping basket would be: one ball or skein of light-coloured worsted, aran or medium yarn, 5 mm needles, scissors and a tapestry needle. As a rule of thumb, a standard 50 g ball of worsted or aran cotton is often enough for a practice dishcloth, though yardage varies by brand. A 100 g ball of wool, acrylic or blend will usually give you plenty for a small scarflette or neck warmer.
Learn the Basic Knitting Words
- Cast on: Create the first row of stitches on the needle.
- Working yarn: The yarn attached to the ball.
- Tail: The loose yarn end.
- Knit stitch: A stitch that usually makes a smooth V on the front.
- Purl stitch: The reverse partner of knit, making a bump on the front.
- Bind off or cast off: Finish the stitches so the fabric does not unravel.
- Tension or gauge: How tightly or loosely you knit. It matters more for fitted items than for your first practice piece.
In North America, you will often see bind off. In the UK and Australia, cast off is common. They mean the same thing.
English vs Continental Knitting
There are two common ways to hold the yarn. In English-style knitting, the yarn is held in the right hand and wrapped around the needle. This is sometimes called throwing. Many beginners like it because the wrap is a clear, separate action.
In continental-style knitting, the yarn is held in the left hand and the right needle picks the yarn through the stitch. This may feel familiar if you crochet, and it is common in parts of Europe, including German-speaking knitting traditions.
Neither style is better. Speed is not the goal at the beginning; comfort and consistency are. Try each style for a short practice session. If your right hand keeps letting go of the needle, try continental. If left-hand yarn tension feels chaotic, try English.
How to Make a Slip Knot
Many cast-ons begin with a slip knot. It counts as your first loop on the needle unless a pattern says otherwise.
- Make a loop with the yarn tail crossing over the working yarn.
- Pull a small loop of the working yarn through the first loop.
- Place that loop on your needle.
- Pull gently on the yarn ends until the loop sits on the needle.
The slip knot should slide along the needle with light pressure. If it is strangling the needle, loosen it. Tight stitches are one of the most common beginner frustrations.
How to Knit for Beginners: Cast On First
The long-tail cast on creates a neat, flexible edge and is useful for scarves, dishcloths, blankets and many garments. It can feel fiddly at first because both yarn strands are doing something, but it becomes quick with practice.
How much tail do you need?
The tail length depends on the yarn thickness and number of stitches. A practical beginner method is to wrap the yarn around the needle once for each stitch you plan to cast on, then add extra length for weaving in later. For a small practice piece, use more tail than you think you need. Running out happens to everyone.
Step-by-step long-tail cast on
- Make a slip knot and place it on the needle.
- Hold the needle in your right hand, or in the hand that feels most natural.
- Hold both yarn strands in your palm with your lower three fingers. Let the tail run over your thumb and the working yarn run over your index finger.
- Open your thumb and index finger apart to make a slingshot shape, like a small yarn triangle.
- Tilt the needle tip slightly down and bring it under the strand around your thumb.
- Move the needle over the strand on your index finger and catch it.
- Pull that strand back through the thumb loop.
- Release your thumb and snug the new stitch gently onto the needle.
- Reset the yarn triangle and repeat until you have the number of stitches you need.
Practise by casting on 20 stitches. Aim for stitches that sit close together but can still move. Think snug, not tight.
Common cast-on problems
- Too tight: Cast on over two needles held together, then slide one out, or consciously leave a little space between stitches.
- Tail runs out: Pull the stitches out and start again with a longer tail. Annoying, but normal.
- Uneven stitches: Keep going for practice. Your first cast-on does not need to be beautiful.
How to Make the Knit Stitch
The knit stitch is the foundation. If you knit every row, you create garter stitch: a soft, ridged fabric that lies fairly flat and is ideal for beginner projects.
- Hold the needle with the cast-on stitches in your left hand.
- Hold the empty needle in your right hand.
- Insert the right needle into the front of the first stitch, moving from left to right.
- Wrap the working yarn around the right needle.
- Pull the new loop through the old stitch.
- Slide the old stitch off the left needle.
You have made one knit stitch. Repeat across the row. When all stitches have moved to the right needle, turn the work so the full needle is back in your left hand and knit the next row.
English-style knit stitch
Hold the yarn in your right hand. Insert the right needle into the stitch, wrap the yarn around the needle, pull the loop through and slide the old stitch off. This style can feel deliberate and easy to understand.
Continental-style knit stitch
Hold the yarn in your left hand. Insert the right needle into the stitch and use the needle tip to pick the yarn through. This can feel efficient once your yarn tension becomes steady.
For your first practice, knit 5 to 10 rows. Count your stitches at the end of each row. If you started with 20 and now have 22, you may have made accidental yarn overs or knitted into a gap.
How to Purl
Purl is the partner to knit. It creates a bump on the front of the work. When you knit one row and purl the next, the front becomes smooth stockinette stitch and the back becomes bumpy reverse stockinette.
- Hold the needle with stitches in your left hand.
- Bring the working yarn to the front of the work.
- Insert the right needle into the front of the first stitch from right to left.
- Wrap the yarn around the right needle.
- Pull the new loop through to the back.
- Slide the old stitch off the left needle.
The most common purl mistake is forgetting the yarn position. For a knit stitch, the yarn starts at the back. For a purl stitch, the yarn starts at the front. Say it out loud if it helps: yarn back for knit, yarn front for purl.
How to Switch Between Knit and Purl
When switching stitches, move the yarn between the needle tips, not over the needle. Moving it over the needle can create an accidental extra loop called a yarn over.
Try these simple stitch patterns:
- Garter stitch: Knit every row.
- Stockinette stitch: Knit one row, purl one row.
- Rib stitch: Knit 1, purl 1 across the row, moving the yarn between the needles each time.
A useful practice square is 4 rows of garter stitch, 4 rows of stockinette, then 4 rows of rib. It lets you see how much fabric can change with only two stitches.
How to Bind Off or Cast Off
Binding off finishes the edge so your knitting does not unravel. Do it when your piece is the size you want.
- Knit the first two stitches.
- Use the left needle tip to lift the first stitch over the second stitch and off the right needle.
- Knit one more stitch.
- Lift the previous stitch over the new stitch and off the needle.
- Repeat until one loop remains.
- Cut the yarn, leaving a tail.
- Pull the tail through the last loop and tighten gently.
If your bind-off edge is tight, use a larger needle just for this step or keep your hands deliberately relaxed. A tight bind-off can make the edge pucker.
How to Fix Beginner Knitting Mistakes
Dropped stitch
A dropped stitch looks like a loose loop with a ladder of horizontal strands above it. Stop pulling the fabric. Use a crochet hook or needle tip to catch the loop, then pull each horizontal strand through the loop one row at a time until the stitch is back at the top.
If that feels stressful, secure the loose loop with a stitch marker, safety pin or spare piece of yarn. You can come back to it later.
Extra stitches appeared
Extra stitches often come from accidental yarn overs, knitting into the space between stitches or forgetting to slide the old stitch off the left needle. Count your stitches at the end of each row while learning. It is much easier to fix one row than ten.
Holes in the fabric
Small holes are usually accidental yarn overs. Check whether the yarn travelled over the needle when switching between knit and purl. A few holes in a practice piece are not a disaster; they are useful clues.
Uneven tension
Uneven tension is expected. Try lowering your shoulders, loosening your grip and avoiding the urge to yank the yarn after every stitch. Washing or blocking can soften the look slightly, but repetition is what really improves tension.
Twisted stitches
If every stitch feels difficult to knit into, your stitches may be twisted or mounted differently from the tutorial you are following. In standard Western knitting, the front leg of the stitch usually sits slightly closer to the needle tip on the right. If the back leg is leaning forward or the stitch feels locked, check how you wrapped the yarn on the previous row.
A simple fix is to pause, look at how the loop sits on the needle, and insert your needle through the leg that opens the stitch rather than forcing it. Some knitting traditions mount stitches differently, so consistency matters more than perfection at this stage.
Beginner Troubleshooting Cheat Sheet
Extra stitch: Usually an accidental yarn over. Check that you move the yarn between the needles, not over the needle.
Tight stitches: Loosen your grip, try wooden needles, or cast on over a larger needle.
Dropped stitch: Stop pulling, catch the loose loop, and ladder it back up with a crochet hook.
Messy edges: Normal at first. Edge techniques can wait until your basic stitches feel steady.
Uneven rows: Your tension is developing. Short, regular practice helps more than one long session.
Your First Knitting Project: A Simple Garter Stitch Dishcloth or Scarflette
Your first project should be small enough to finish and simple enough to build confidence. A garter stitch dishcloth or short scarflette uses only casting on, the knit stitch and binding off.
Simple dishcloth
- Use smooth cotton or cotton-blend yarn.
- Choose one standard 50 g ball if possible, checking the yardage on the label.
- Cast on around 30 to 40 stitches, depending on yarn thickness and desired size.
- Knit every row until the piece is roughly square.
- Bind off loosely.
- Weave in the ends with a tapestry needle.
- Wash according to the yarn label.
The final size will vary with your yarn, needles and personal tension. That is fine for a dishcloth.
Simple scarflette
- Use wool, acrylic or a soft blend.
- Choose a 100 g ball if you want generous length without worrying about running out.
- Cast on enough stitches for a narrow rectangle.
- Knit every row until it wraps comfortably around your neck.
- Bind off and weave in the ends.
- Wear it tucked into a coat, or add a button and loop later if you feel confident.
A full scarf is possible, but it can feel endless as a first project. A scarflette gives you the same practice with a more satisfying finish.
A Calm First-Week Practice Plan
- Day 1: Practise the slip knot and long-tail cast on with 20 stitches.
- Day 2: Knit every row without worrying about speed.
- Day 3: Count stitches and learn to spot extra loops or dropped stitches.
- Day 4: Learn purl and make a small stockinette sample.
- Day 5: Practise switching between knit and purl.
- Day 6: Start your dishcloth or scarflette.
- Day 7: Bind off and weave in the ends.
Stretch this over several weeks if you prefer. Knitting is not a race, and short, relaxed sessions are often more useful than one long, frustrating one.
What to Learn Next
Once you can cast on, knit, purl and bind off, choose one new skill at a time. Good next steps include increasing and decreasing stitches, reading a simple written pattern, knitting ribbing more evenly, or learning to knit in the round on circular needles.
Save the fitted sweater for later. Gauge, shaping and sizing matter more for garments, and they are much easier once your hands trust the basics.
FAQ
Is knitting hard for beginners?
Knitting is not difficult to understand, but it can feel physically awkward at first. Your hands are learning new movements, and that takes repetition. Start with short practice sessions and a simple garter stitch project.
Should I learn English or continental knitting first?
Learn whichever feels more comfortable. English knitting holds the yarn in the right hand and wraps it around the needle. Continental knitting holds the yarn in the left hand and picks the yarn through the stitch. Crocheters and some European learners may prefer continental, but both styles work.
What is the easiest thing to knit first?
A garter stitch dishcloth, coaster or small scarflette is ideal. These projects use only casting on, knitting every row and binding off, so you can focus on rhythm and tension.
Why do I keep adding stitches by accident?
You may be moving the yarn over the needle and creating accidental yarn overs, or knitting into the gap between stitches instead of the next stitch. Count your stitches at the end of every row until your hands become more consistent.
How do I fix a dropped stitch?
Stop pulling the fabric, catch the loose loop with a crochet hook or needle tip, and pull each horizontal strand through the loop one row at a time. If you cannot fix it immediately, secure the loop so it does not unravel further.
Conclusion: How to Knit for Beginners Without Getting Overwhelmed
The simplest path for how to knit for beginners is to keep the first goal small: buy smooth medium yarn, learn the long-tail cast on, practise the knit stitch, add purl when you are ready, bind off neatly and make one small project. Your first piece may have uneven edges or a few imperfect stitches, but it will teach your hands what no amount of reading can. Cast on, knit a row, turn the work and keep going.
Join the conversation
Sign in — Sign in to join the conversation.