
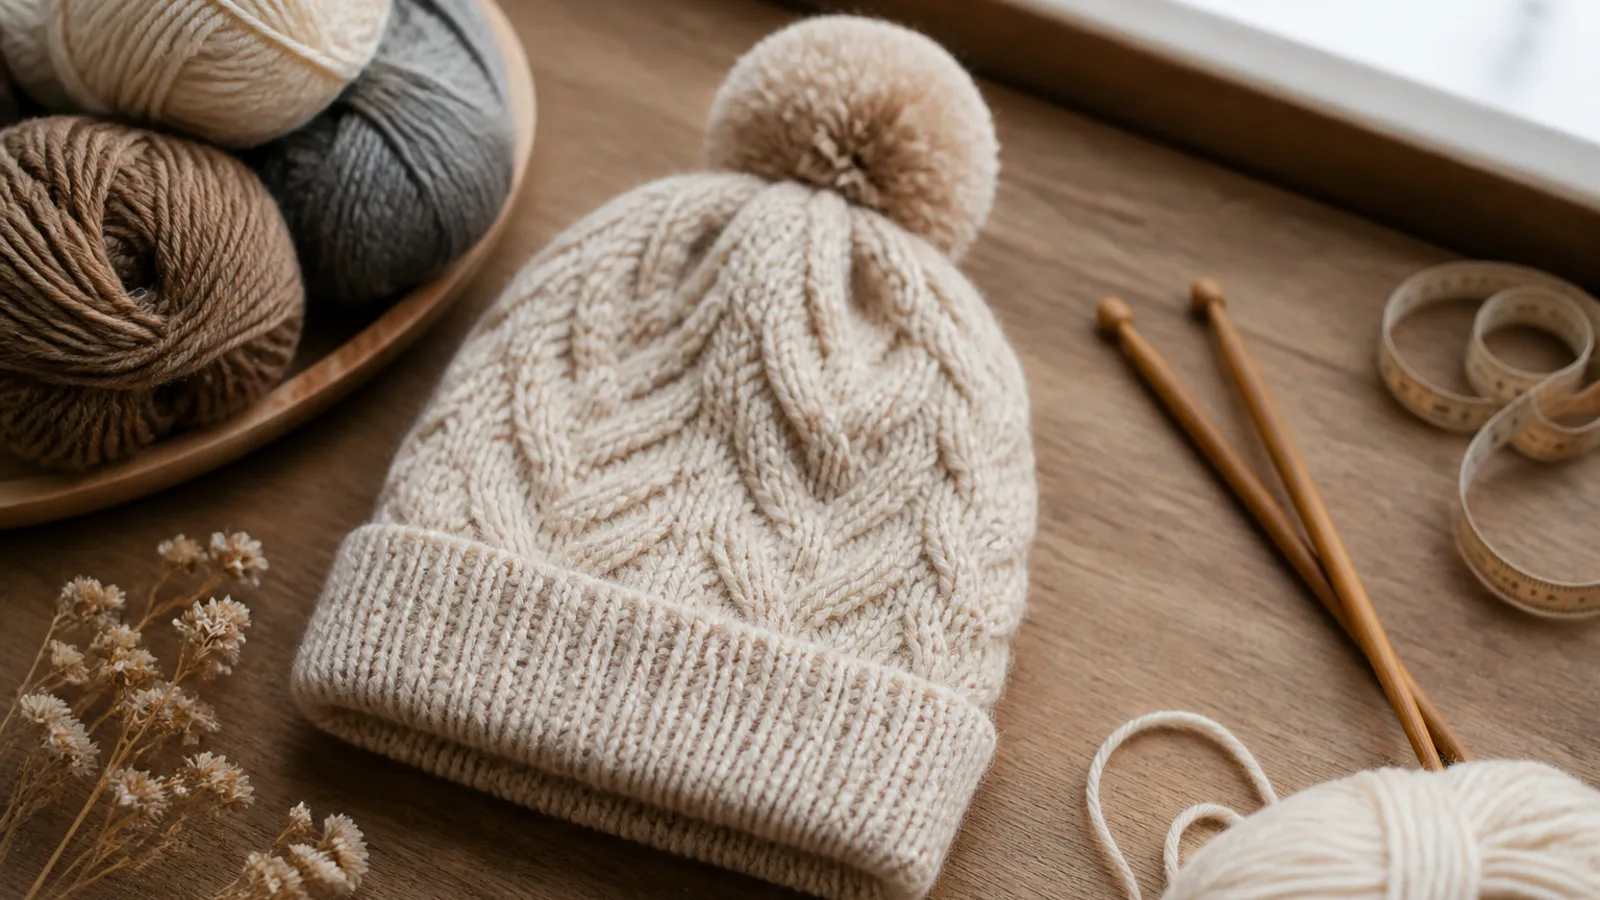
If you want a next-step project after learning the basics, how to knit a hat is one of the most satisfying places to begin. A hat is small enough to finish without losing momentum, but practical enough that you’ll actually wear the result. The tricky part is not the knitting itself so much as making sure the hat fits, holds its shape, and ends cleanly. That’s what this guide is for.
You do not need to be an expert to make a good first hat. What you do need is a simple plan, the right yarn, and a clear sense of what the pattern is asking for. Once you understand measuring, gauge, shaping, and finishing, the whole project becomes much less mysterious.
What you need before you start
Before choosing a pattern, gather a few basic tools. The exact method you use may vary, but most hat projects call for the same core supplies:
- Yarn in the weight recommended by your pattern
- Needles in the size that gives you the correct gauge
- A tape measure
- Stitch markers
- A tapestry needle for finishing
- Scissors
If your pattern is worked in the round, you may use circular needles or double-pointed needles. Circular needles are often the easiest place to start because they let you knit a tube without sewing a seam later. If you are new to the idea, there is nothing wrong with choosing a very straightforward hat pattern designed for beginners.
It also helps to already know how to cast on, knit, purl, and bind off. Those are the building blocks of nearly every simple hat. If you can make those stitches comfortably, you are ready for this project.
Choosing the right yarn and needles for a first hat
The yarn you choose can make the difference between a hat that feels encouraging and one that feels frustrating. For a first hat, smooth medium-weight yarn is usually the easiest option. It shows stitches clearly, holds shape well, and is less likely to snag while you work.
What makes yarn beginner-friendly
Yarn that is very fuzzy, very dark, or highly textured can be harder to read stitch by stitch. That does not make it bad yarn, but it can slow you down when you are still learning. A lighter solid color often makes it easier to see what your hands are doing.
Wool and wool blends are popular for hats because they have some natural stretch and warmth. Acrylic can also work well, especially if you want something affordable and easy to care for. The best choice is the one that fits your comfort, budget, and how the hat will be used.
Matching needle size to yarn
The yarn label usually suggests a needle size, but think of that as a starting point rather than a rule. The real key is gauge, which means how many stitches and rows you get in a certain space. If your gauge is off, your hat may end up too small, too large, too loose, or too stiff.
For hats, fabric that is a little firm is often better than fabric that is too loose. A hat needs enough structure to sit nicely on the head and keep its shape over time. A very airy fabric may look pretty on the needles but can grow too much with wear.
How to measure for a hat that fits
Fit is where many first hats go wrong. The good news is that you do not need guesswork. A tape measure and a few minutes are enough to get a much better result.
Measure the head circumference
Wrap the tape measure around the widest part of the head, usually just above the ears and across the forehead. Keep the tape level, but not tight. You want the measurement that the finished hat should comfortably accommodate.
If the person wearing the hat likes a snug fit, you can use a small amount of negative ease, meaning the hat is slightly smaller than the head measurement so it stretches into place. If they prefer a looser fit, use a little extra room. Some people like a beanie that hugs the head closely. Others prefer a more relaxed shape. There is no single correct fit.
Do not rely too heavily on age or size labels like “adult” or “teen” if you are knitting for someone else. Head sizes vary more than people expect. Measuring is the simplest way to avoid disappointment.
Decide on hat length
Length changes the style of the hat as much as circumference does. A shorter hat sits closer to the top of the ears. A standard beanie covers the ears more fully. A slouchier hat needs extra length before the crown shaping begins.
Think about whether the brim will be folded. A folded brim adds warmth and structure, but it also uses up part of the hat’s total length. If you plan to add one, include that in your measurements from the start.
Understanding pattern language without feeling overwhelmed
Hat patterns can look intimidating at first, but most of the language repeats from one pattern to another. Once you know a few common terms, the instructions become much easier to follow.
The most common terms you’ll see
- Cast on: create the first row of stitches
- Bind off: finish the edge so it does not unravel
- Round: one full circuit around the hat
- Stitch marker: a small marker that helps you track sections
- Decrease: reduce the number of stitches
- Increase: add stitches, though this is less common in simple hats
- Ribbing: a stretchy fabric often used at the brim
- Gauge: the number of stitches and rows in a set measurement
When a pattern says “work in the round,” it means you are knitting in a tube instead of making a flat piece. That is useful for hats because it removes the need for a seam. If a pattern says “decrease evenly,” it means spread the decreases out so the crown narrows gradually rather than bunching up in one spot.
Reading a hat pattern step by step
Before you cast on, read the whole pattern once without trying to knit at the same time. Look for the size instructions, the stitch count, the section where the body of the hat is worked, and the point where the crown shaping begins.
If the pattern offers multiple sizes, find the one that matches your measurement rather than assuming the default will work. Mark the instructions for your size so you do not have to keep searching through the line.
It also helps to notice whether the pattern uses repeats. A repeat is a short sequence of stitches that happens over and over. Stitch markers make those sections easier to track, especially if the crown shaping is divided into equal parts.
How to knit a hat from cast on to crown shaping
Once you understand the pattern, the actual knitting is usually straightforward. The main challenge is staying aware of the fit as you go instead of waiting until the end.
Choosing a cast-on method
For a first hat, choose a cast-on that has a little stretch. A tight edge can make the hat hard to put on, even if the body fits well. A stretchy cast-on helps the brim sit comfortably without digging in.
If you are unsure which cast-on to use, pick a method you already know and can do evenly. A neat, flexible edge is more important than a fancy one. If the pattern recommends a specific cast-on for stretch, that is worth following.
Knit the brim or main fabric
Many beginner hats start with ribbing at the brim, often a simple knit-and-purl pattern. Ribbing naturally pulls in and helps the hat stay on the head. It is also forgiving if your tension changes slightly.
Some patterns use garter stitch for texture, while others use stockinette for a smooth finish. Ribbing is often the most practical choice for a first hat because it balances stretch and structure well.
As you knit, keep an eye on your tension. If your stitches get tighter or looser as you go, the hat may fit unevenly. It is normal for beginners to need a little time before their knitting feels consistent. Try to keep your hands relaxed rather than pulling the yarn too firmly.
Check the fit as you go
Do not wait until the hat is finished to find out whether the size is off. After a few inches, measure the width of the fabric and compare it with the pattern’s gauge or finished measurements. If possible, stretch the hat lightly and see how it looks against the head.
If the hat is already clearly too wide or too small before the crown shaping begins, it is worth pausing and adjusting your plan. That might mean starting over with a different needle size, or in some cases choosing a different size within the same pattern.
Here is a simple rule of thumb: if the fabric looks loose enough that you can see large gaps between stitches, the hat may not have enough structure. If it feels stiff and difficult to stretch, it may be too tight for comfortable wear.
How to handle gauge, size, and small adjustments
Gauge is one of those knitting ideas that feels technical at first, but it is really just about making sure your stitches match the pattern’s assumptions. Two people can use the same yarn and needles and still get different results because they knit with different tension.
If you are making a hat for yourself, the easiest solution is to knit a small swatch before you begin and check it against the pattern gauge. If your swatch does not match, change needle size and try again. It is a little extra work up front, but it saves time later.
If the hat turns out too big, a smaller needle size often helps. If it is too small, try a larger needle size next time, or choose a larger size in the pattern. Sometimes the difference is just a few stitches, but that can make a noticeable difference in comfort.
It is also worth remembering that some yarns relax after washing and wearing, while others do not. That is another reason to choose a slightly firm fabric rather than one that is very loose from the start.
Shape the crown neatly and confidently
The crown is the top of the hat, where the tube narrows into a closed shape. This is usually the part that makes beginners nervous, but it is mostly a matter of following a repeated decrease pattern.
What decreases do
Decreases reduce the number of stitches in the round, which pulls the top of the hat inward. The decreases may happen every round, every other round, or at a different interval depending on the style. The pattern will usually tell you exactly when to work them.
Even if the language looks unfamiliar, the idea is simple: knit the body until the hat is tall enough, then gradually make it narrower until only a few stitches remain.
Keep the shaping neat
Stitch markers are especially useful during crown shaping because they help you divide the round evenly. This makes the decreases look balanced instead of lopsided. If the pattern asks you to decrease in several sections, markers can keep those sections clear.
The shape of the crown can change the look of the whole hat. A few evenly spaced decreases can create a smooth, round top. Faster shaping can make the crown more pointed. Follow the pattern style you want, but do not be afraid to pause and check that your decreases are landing where they should.
Finish the hat cleanly
The final steps matter more than many beginners expect. A neat finish can make a simple hat look polished, while a rushed finish can undo all your hard work.
Bind off and close the top
When the pattern tells you to bind off, keep the edge flexible. If the bind-off is too tight, the opening may not stretch enough or may feel uncomfortable at the crown. A relaxed finish is usually better than one that pulls in too aggressively.
After binding off, the top is often closed by threading the yarn through the remaining stitches with a tapestry needle and drawing them together. Pull the yarn snugly, but not so hard that the crown puckers. You want the top to close smoothly without forming a little knot-like bump.
Weave in ends and block lightly
Weave in the yarn tails securely so they do not work loose with wear. A few careful passes through nearby stitches usually does the job. If the yarn is slippery, take a little extra time to secure the ends well.
Light blocking can help smooth out the fabric and even the shape, especially if the yarn is a wool or wool blend. Blocking is not magic, though. It can tidy a good hat, but it will not completely fix a poor fit. That is why measuring and gauge matter so much earlier in the process.
Common beginner mistakes and how to avoid them
Most first-hat problems are very fixable, and many can be prevented before you cast on.
- Skipping gauge: even a small difference can change the fit.
- Choosing hard-to-see yarn: textured, dark, or fuzzy yarn can make it harder to catch mistakes.
- Not measuring the head: guessing often leads to a hat that is too tight or too loose.
- Forgetting the brim stretches: the brim needs enough give to fit comfortably.
- Pulling the crown too tight: this can create a puckered top instead of a smooth finish.
- Ignoring the pattern size instructions: “one size” is not always the right size for the wearer.
If you make one of these mistakes, do not assume the whole project is ruined. Knitting is forgiving in small ways. You may be able to adjust later, especially if you notice the issue before finishing the crown.
Easy ways to customize your first hat
Once you have made one plain hat, it becomes much easier to experiment. The best first modifications are the ones that change the look without making the pattern much harder to follow.
- Add a folded brim for extra warmth
- Use simple stripes with one or two extra colors
- Make the hat slouchier by knitting a little more length before shaping
- Attach a pom-pom after finishing
- Use a decorative ribbing pattern once you are comfortable with basic ribbing
If you are nervous, keep your first version plain. That gives you a chance to focus on fit and construction. Once you know the hat works, you can make the next one more playful.
When to choose a different pattern
Not every hat pattern is the right first project. If the instructions feel crowded with abbreviations, unusual stitch patterns, or complex colorwork, choose something simpler. There is no prize for forcing yourself through a pattern that is too advanced for where you are right now.
A good beginner hat pattern should tell you what size it is, what yarn and needles to use, how many stitches to cast on, where the body ends, and how the crown is shaped. If that information is hard to find, it may be better to choose a different pattern.
Sometimes the smartest move is to knit a very plain hat first, then use what you learn to tackle something more decorative next time. That progression builds confidence faster than trying to leap straight into a complicated project.
FAQ
How many stitches do I need to knit a hat?
There is no single number that works for every hat. The stitch count depends on your yarn, needle size, head circumference, and gauge. A pattern should give you the exact number to cast on for the size you need.
Do I need circular needles to knit a hat?
Not necessarily. Many hats are knitted on circular needles because they are convenient for working in the round, but some patterns use double-pointed needles or a long circular needle with a technique called magic loop. Choose the method you are most comfortable with.
How do I know if my hat will fit before I finish it?
Measure your gauge early and compare your fabric width with the pattern’s finished measurements. You can also stretch the piece gently around the head before crown shaping begins. Checking fit partway through is much easier than discovering a problem after bind-off.
What is the easiest stitch pattern for a beginner hat?
Simple ribbing at the brim and smooth stockinette for the body is one of the easiest combinations. It is easy to read, easy to follow, and gives the hat a classic look. If you want even more simplicity, choose a plain pattern with no color changes or special texture.
Why does my hat turn out too loose or too tight?
Most of the time, the cause is gauge. If your stitches are looser than the pattern expects, the hat will be bigger and may feel floppy. If your stitches are tighter, the hat may be small or stiff. Needle size, yarn choice, and your personal tension all play a part.
If you remember only one thing from this guide, make it this: how to knit a hat is less about memorizing knitting jargon and more about matching the yarn, measurements, and shaping to the head you are knitting for. Once you understand those pieces, the project becomes much easier, and your finished hat is far more likely to fit well and look polished.
Join the conversation
Sign in — Sign in to join the conversation.