
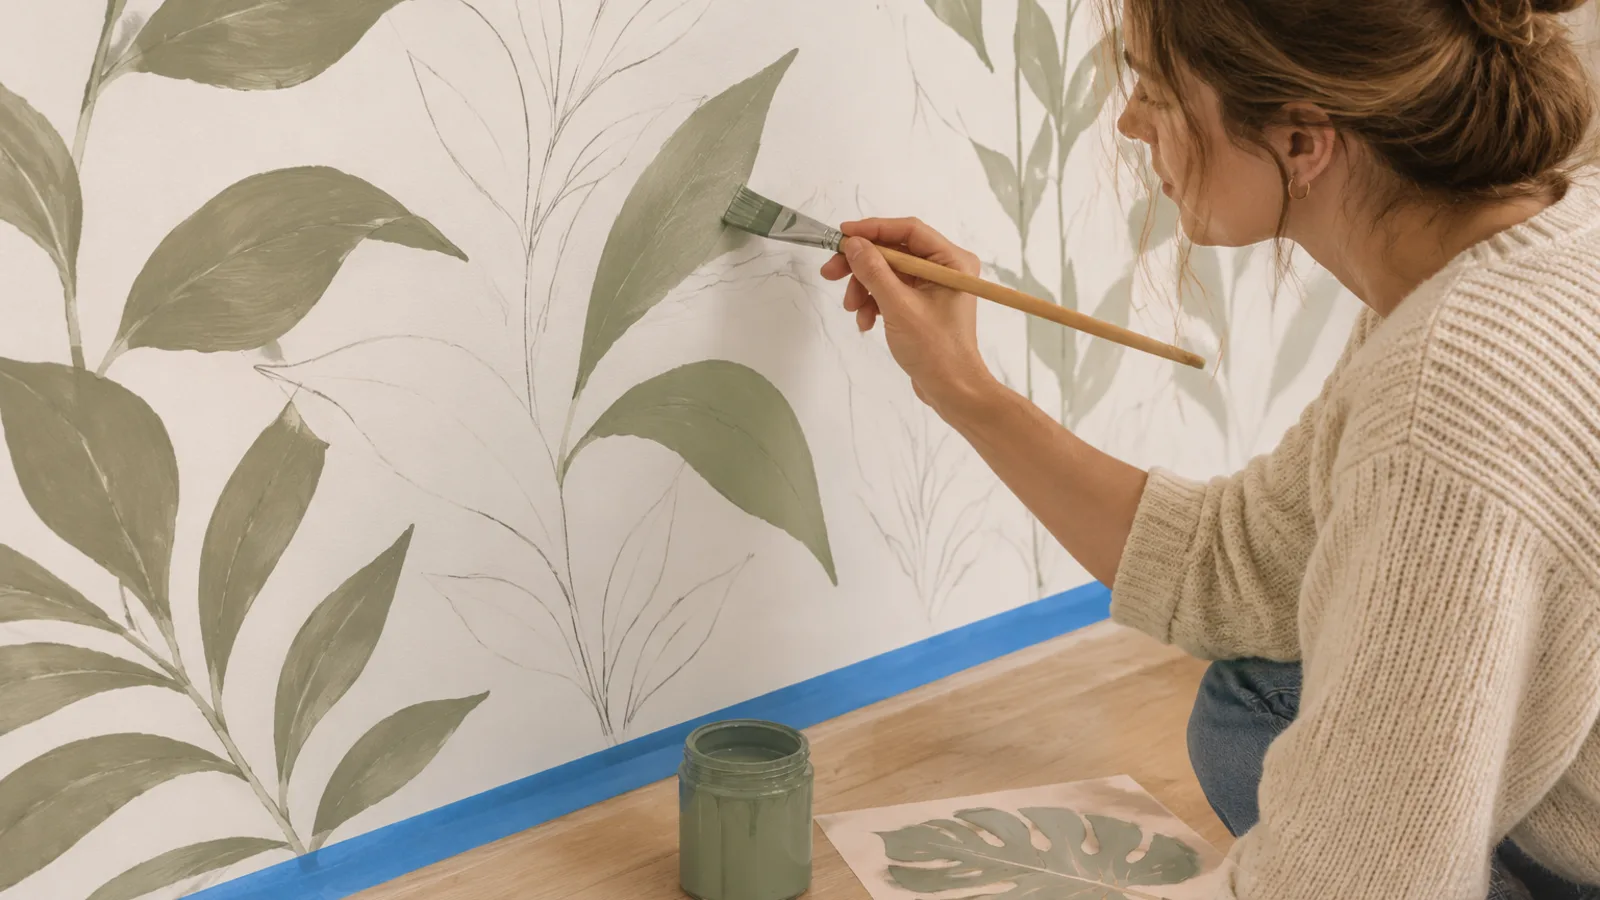
The fear isn't lack of vision — it's lack of a system. Most people who abandon a mural idea before they begin aren't stopped by their design instincts; they're stopped by the moment they imagine standing in front of a blank wall with a brush and nothing but a vague memory of a saved image to guide them. Freehand murals are genuinely difficult, and professional mural painters know this — which is why they don't work freehand either. They use transfer techniques: reliable, repeatable methods for getting a design onto a wall accurately, so the painting becomes filling in and refining rather than inventing on the spot.
This guide explains how to paint a wall mural using three of those techniques — the grid method, a projector, and cut-vinyl stencils — so you can choose the one that fits your space, your budget, and the design you already have in mind. Each method is achievable on a weekend; none requires drawing ability.
Step 1: Wall Preparation and Paint Selection
Surface preparation is where most DIY murals quietly fail. Paint applied over a dusty, greasy, or glossy surface will look patchy within weeks, and tape lines will lift at the edges no matter how carefully you apply them. The extra hour spent on prep pays back in a result that holds up and looks intentional.
- Clean the wall thoroughly. Wipe it down with a damp cloth and a small amount of household degreaser, particularly in kitchens or near light switches. Let it dry completely before doing anything else.
- Fill any holes or cracks with a lightweight filler, sand smooth once dry, and spot-prime those areas so they don't absorb paint differently from the surrounding wall.
- Address glossy surfaces carefully. Water-based latex paint over a lightly sheened wall can often be prepped with fine-grit sandpaper alone. However, if your existing wall finish is a high-gloss oil-based paint, sanding alone is not enough — apply a bonding primer first. Without it, the new paint layer is likely to peel, particularly when tape is pulled.
- Let your base coat cure fully. If you've recently repainted, wait at least 48 hours for latex paint to cure before taping or painting over it. Tape pulled from fresh paint will lift the base coat with it.
For the mural itself, you have three main paint options. Latex wall paint in sample pots works well for large flat areas of colour and is widely available in custom-mixed shades. Acrylic craft paint — the small bottles sold at craft retailers — is ideal for detailed work and mixes easily for custom tones. Chalk paint gives a very flat, dusty finish that suits soft botanical styles and is forgiving to blend. Avoid oil-based paints for mural work; they dry slowly, yellow over time, and are difficult to touch up against a water-based base coat.
Gather your tools before you start: low-tack painter's tape, angled sash brushes in two sizes, a small foam roller for large fills, a chalk line or laser level for geometric work, a standard pencil, and a damp cloth kept beside you at all times for instant corrections.
Step 2: Choose a Design That Works for Your Space
Not every design suits every technique, and not every design suits every room. Before committing to a method, consider both the structural type of design you want and where it will live.
Architectural and geometric designs — arches, panel moulding, grid lines, trompe-l'œil windows — are mostly straight lines and simple curves. The crisp tape edges carry most of the visual work, so small brushwork imperfections disappear. A painted arch over a crib in a nursery, a panel-moulding grid along a dining room wall, or a trompe-l'œil window in a narrow hallway are all achievable first projects. These are arguably the most forgiving designs for a first-time muralist.
Botanical and organic designs — trailing leaves, branches, loose florals — rely on repeated shapes rather than precise symmetry. Slight variation between repeats actually looks intentional, which is a genuine advantage when you're working with a stencil or the grid method. A trailing eucalyptus corner behind a bed, a half-wall leaf scatter in a dining space, or a single oversized floral stem above a console table all suit this approach.
Before drawing a single pencil line, rough out the scale of your design with painter's tape directly on the wall and live with it for a day. What looks right on a phone screen often needs to be significantly larger on a real wall to carry the visual weight you imagined.
The Three Transfer Techniques
The Grid Method: Best for Large-Scale Botanical and Figurative Designs
The grid method removes the most intimidating part of mural painting by breaking your reference image into small squares and asking you to copy one square at a time. When you're only looking at a contained segment, the shapes inside it become simple enough to replicate even without formal drawing practice.
- Print your reference image, or display it on a tablet, and overlay it with an even grid. For a printed image, draw the grid in pen. For a digital version, use a free grid-overlay app or a simple photo editor.
- Using a chalk snap line and a long ruler, draw the same grid on your wall, scaled up proportionally. For a typical accent wall, squares in the range of 10 to 15 centimetres tend to give a manageable level of detail.
- Number the squares on both the reference and the wall so you're always working in the corresponding position.
- Copy the shapes inside each square onto the wall in pencil, one at a time. Focus only on the contents of that cell — not the whole image.
- Once the full design is pencilled in, paint it, let it dry completely, then remove the chalk grid with a barely damp cloth.
This is the slowest of the three methods, so it suits a project you can return to across a couple of weekends. The result can be highly fluid and organic — particularly for large trailing botanical designs where a trailing eucalyptus branch gains rather than loses character from slight variation between sections.
The Projector Method: Best for Complex or Very Large Designs
A projector allows you to cast any digital image onto a wall at whatever scale you choose, trace the outline in pencil, then paint within those lines. It's the fastest method for transferring a complex design and the best choice when you want architectural precision — a perfect arch radius, or the exact proportions of a botanical print you've sourced.
- Load your design as a JPEG or PNG onto a laptop or phone. Use a high-resolution image — one that is sharp at large sizes — to avoid a blurred projection that's difficult to trace accurately.
- Set up a pico projector, available at a wide range of price points (worth checking second-hand before buying new), or use a phone with a compatible wall-mount adapter. Darken the room as much as possible.
- Tape the projector firmly in position before you begin tracing. Any shift mid-session will misalign the image and require you to start again.
- Check the projection is level with a small spirit level or the projector's built-in correction, then trace the outlines in pencil.
- Remove the projector and paint.
The main limitation is practical: you need a darkened room, and the pencil trace can be faint on a textured wall. If your surface has significant texture, go over the pencilled outlines with a fine chalk pen before painting so you don't lose the guide lines under your first coat.
Cut-Vinyl Stencils: Best for Repeat Patterns and Sharp-Edged Designs
Vinyl stencils produce some of the sharpest DIY mural results because the material lies completely flat against the wall and virtually eliminates bleed-through when applied correctly. Unlike paper or acetate stencils, vinyl is repositionable, durable across many uses, and thin enough to follow a lightly textured surface.
- Source your stencil: buy a pre-cut vinyl stencil from a craft retailer, or cut your own from adhesive vinyl film using a Cricut or Silhouette cutting machine with an SVG design file.
- Clean and dry the wall section. Press the stencil flat from the centre outward to remove air bubbles, and run a fingernail or card firmly along all edges.
- Load a foam dauber or stencil brush very lightly — far less paint than feels right. Dab rather than stroke, using an almost-dry application. This single step prevents virtually all bleed-through.
- Apply two or three light coats rather than one heavy coat, letting each dry for a few minutes before the next.
- Peel the stencil back slowly at a low angle while the final coat is still slightly tacky — not fully wet, not fully dry.
For readers who cut their own designs, StudioSVG offers cut-ready SVG and PNG files for Cricut and Silhouette machines — animals, botanicals, and home-decor motifs among them, with instant download — as one option for sourcing wall-ready designs. SVG files from copyright-free illustration archives and design marketplaces are other routes worth exploring.
The honest limitation of stencilling is registration: for a repeat pattern, each placement needs to align precisely with the last. Mark registration points on the wall in chalk before you begin and check each placement with a small level rather than relying on your eye.
Painting for a Professional Finish
The transfer method matters far less than how you apply paint once the guide lines are in place. These habits separate a mural that looks high-end from one that looks unfinished.
- Load the brush lightly. Dip, then wipe most of the paint off on a paper towel before touching the wall. A heavily loaded brush bleeds under tape and stencils and creates hard, uneven edges.
- Seal tape edges with your base coat first. Before applying your mural colour over painter's tape, paint a thin coat of your wall's base colour along the tape edge and let it dry. Any seepage will match the wall behind it, permanently closing the gap so your mural colour lands perfectly sharp.
- Keep a damp cloth beside you. Wet latex paint lifts cleanly from a wall within roughly two minutes of application. A damp-cloth correction is invisible once dry; a dried mistake requires repainting the base coat.
- Build colour in layers. Two thin coats produce a richer, more even result than one thick coat and make it far easier to blend tones where designs overlap.
- Respect drying times. Touch-dry is not the same as ready to paint over. Wait until the surface is genuinely cool and dry to the touch before adding a second coat — rushing this single step is the most common reason murals look flat rather than deep.
Finishing, Photographing, and Living with Your Mural
Remove tape at a 45-degree angle while the paint is still slightly tacky rather than fully cured. Fully dry paint can crack along the tape line as you peel. If you've waited too long, score lightly along the tape edge with a craft knife before pulling.
Keep small labelled containers of your base colour and mural colours for touch-ups. Murals in well-used areas — behind a sofa, along a hallway — will pick up scuffs over time, and being able to match the paint exactly is far easier than trying to remix by eye months later.
Sealing isn't necessary in every room, but it's worthwhile in kitchens, bathrooms, or children's rooms. A matte polycrylic topcoat protects the surface without altering the flat finish that most murals rely on for their effect. Apply it with a foam roller in one direction and don't overwork it.
To photograph the finished mural, use natural light coming from the side of the wall rather than a straight-on flash, which flattens texture and colour. The ultrawide mode on most recent smartphones captures the scale of a full accent wall in a single shot.
Frequently Asked Questions
Can I paint a wall mural over wallpaper?
It's possible, but not ideal. Wallpaper seams can show through paint, and moisture from the paint can cause the paper to bubble or pull away from the wall. If the wallpaper is in good condition and fully adhered, prime it with a shellac-based or oil-based primer to seal the surface and prevent moisture transfer. If any seams are lifting, re-adhere them before priming. When in doubt, removing the wallpaper first gives you a far more reliable base.
What's the best paint finish for a wall mural — matte, eggshell, or satin?
Matte is the most widely used finish for murals because it has no sheen to catch light unevenly across brushwork, makes touch-ups easier to blend invisibly, and tends to read as more artistic in character. Eggshell is a reasonable choice in rooms that need a slightly more washable surface, such as a hallway. Satin and gloss finishes are generally best avoided for mural work — they amplify every brushstroke and make blending between colours noticeably harder.
How do I paint a mural on a textured wall?
Orange-peel, skip-trowel, and heavier plaster textures make stencilling harder because the stencil can't lie fully flat, which increases bleed risk. The grid and projector methods both work well on texture because the design is pencilled on and painted with a brush rather than through a mask. If you do want to stencil a textured wall, use a stippling motion with a stiff brush and accept that edges will have a softer quality — which can actually suit botanical and organic designs where perfectly hard edges would look out of place.
How long does a DIY wall mural take from start to finish?
This varies considerably by method and design complexity. A simple geometric arch using the projector method on a prepped wall can be completed in a single day. A large-scale trailing botanical using the grid method across a full accent wall is realistically a two-weekend project. The variable most people underestimate is drying time between coats — building that into your schedule rather than rushing it makes the single biggest difference to the final result.
How do I remove or paint over a mural later if I change my mind?
Most murals painted in latex or acrylic over a standard latex base coat can be covered with two coats of a good-quality primer followed by your new wall colour. Very dark mural colours — deep navy, forest green, black — may need a stain-blocking primer and three coats of your new colour before they stop showing through. If the mural was sealed with polycrylic, lightly sand the surface first so the primer has something to grip. In most domestic situations there is no need to strip the wall back to bare plaster.
How to Paint a Wall Mural: Choosing Your Starting Point
The method you choose depends on your design and your timeline. Use the grid method when you want a fluid, hand-drawn quality and have two weekends available. Use a projector when you need architectural accuracy or want to scale a detailed design to a large wall quickly. Use cut-vinyl stencils when you want a crisp, repeatable result and are prepared to work carefully on registration. All three produce results that look considered and deliberate — the difference is only in how the design reaches the wall, not in whether you can draw.
Start with a wall that matters to you, prep the surface properly, and keep your brush drier than instinct suggests. Everything else follows from those two things.
Disclosure: StudioSVG is a sister brand of Maallure.



Join the conversation
Sign in — Sign in to join the conversation.