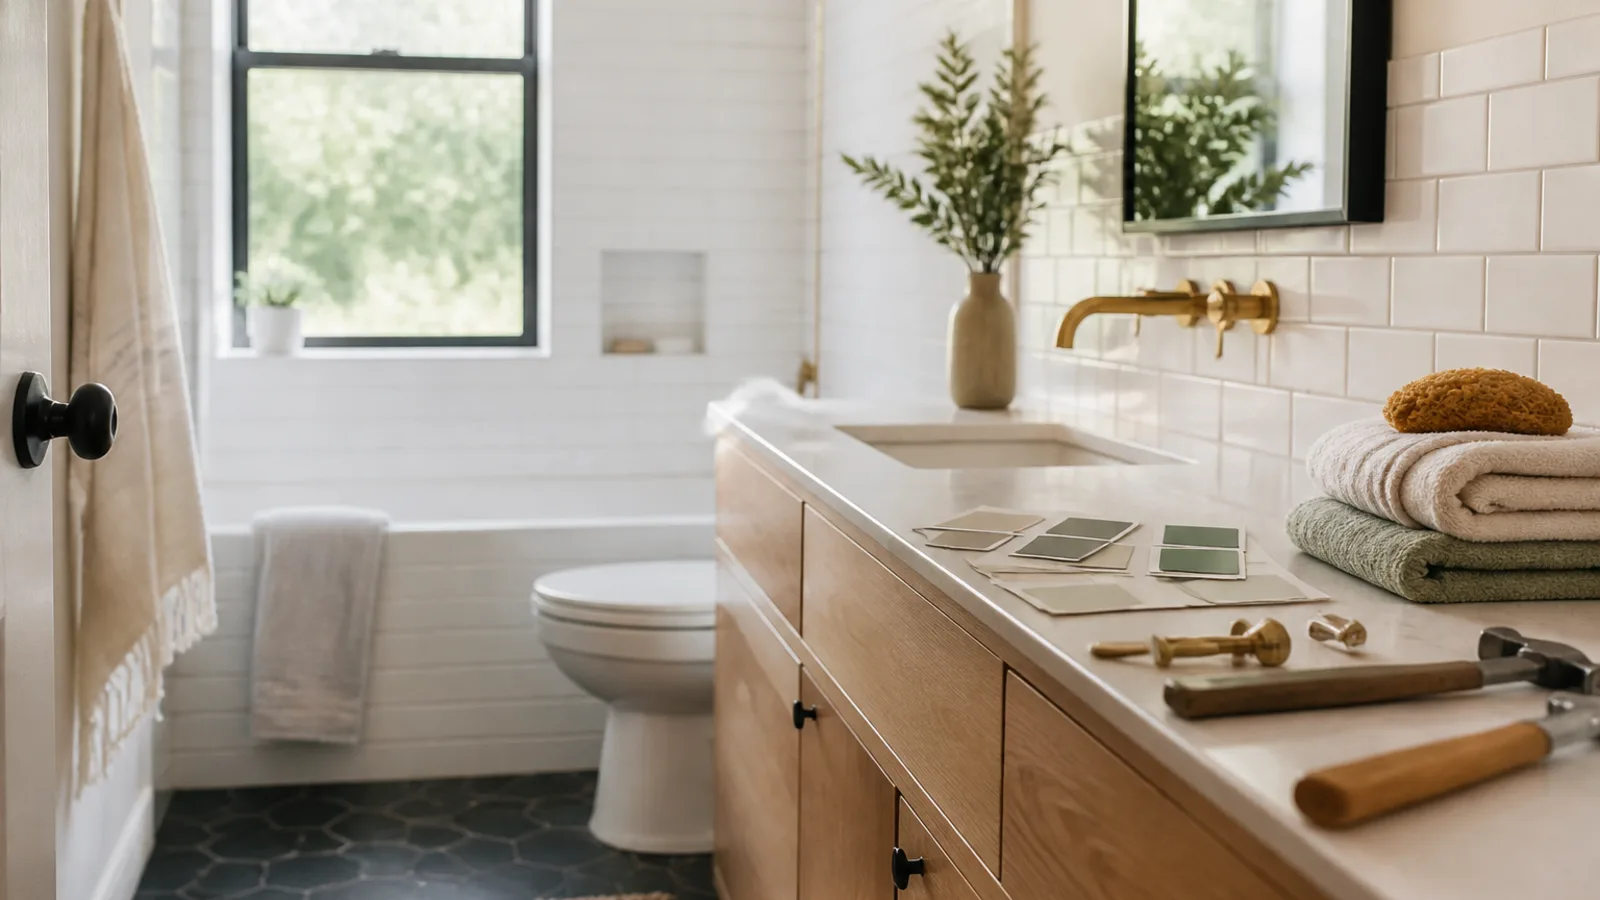
A budget bathroom renovation works best when you stop asking what you can replace and start asking what is worth keeping. Bathrooms are expensive because water, electrics, ventilation, tiling and daily wear all meet in one small room. The cheapest choice is not always the smartest one, especially if it hides a leak or creates more work later.
The good news: you do not need to rip everything out to make a bathroom feel cleaner, brighter and more useful. Use a simple framework for every decision: keep, refresh or replace. It will help you spend where it matters, save where you can, and know which jobs are safe to DIY versus those that need a qualified plumber or electrician.
Start With the Keep, Refresh or Replace Rule
Before you buy tiles, taps or paint, walk through the bathroom and divide every feature into one of three categories.
- Keep: It is safe, sound, functional and does not force an expensive layout change.
- Refresh: It works, but looks dated, stained, dull or unfinished.
- Replace: It leaks, moves, smells damp, is unsafe, is water-damaged or makes the room impractical.
This approach matters because cosmetic problems and hidden problems can look similar at first. Tired grout may simply need cleaning. Recurring mould, loose tiles or a soft floor can point to water getting where it should not.
Make three lists before you spend anything:
- Must fix: leaks, ventilation problems, unsafe lighting, damaged flooring, failed sealant, mould that keeps returning.
- Would improve daily life: better lighting, more storage, a stronger shower, a less cramped vanity, easier-to-clean surfaces.
- Nice to have: new towels, decorative hardware, artwork, a trend-led mirror or a different tile colour.
A beige tiled floor that is firmly attached may be worth keeping. A swollen vanity base from a slow leak should not be disguised with paint. A dated tap can often be swapped without changing the room layout, but moving plumbing to the opposite wall can turn a modest update into a major project.
Tiles: Keep the Layout, Refresh the Look
Keep tiles if they are solid and watertight
Tiles are one of the biggest budget decisions in a bathroom. Removing them can disturb walls, floors, waterproofing and sometimes plumbing. If your wall or floor tiles are firmly attached, not cracked, not loose and not letting water behind them, keeping them can save a lot of disruption.
Older neutral tiles can look far better with improved lighting, fresh paint, new grout, a modern mirror and cleaner accessories. Even a tile colour you do not love may feel less dominant once the rest of the room looks intentional.
Use the 80/20 rule for dated tile
If roughly 80 percent of the bathroom has to stay because of budget, make the remaining 20 percent look crisp and deliberate. Repeat one modern finish, such as brushed nickel, matte black, chrome or warm brass, across the mirror, hooks, cabinet handles or tap. Then choose a calm paint colour that works with the existing tile rather than fighting it.
This is how an older cream, grey or pale pink tile can feel curated rather than forgotten. The goal is not to pretend the tile is new. The goal is to make the whole room feel edited.
Refresh tiles without ripping them out
Start with a deep clean using products suitable for your tile material. Natural stone, glazed ceramic and porcelain can need different care, so check the product label and manufacturer guidance where possible.
- Clean grout lines thoroughly before deciding they need replacement.
- Regrout small areas if the grout is stained, uneven or crumbling at the surface.
- Replace cracked or peeling caulk around baths, showers and basins.
- Paint surrounding walls or the ceiling in a fresh bathroom-suitable finish.
- Use new towels, a bath mat and simple accessories to connect the tile colour to the rest of the room.
Tile paint can be useful in low-splash areas, but it is not magic. In high-use wet zones, especially showers, it may not hold up as well as proper tile replacement. Be realistic about durability before using it as a shortcut.
Replace tiles when there are warning signs
Tiles should be investigated, and possibly replaced, if you notice loose pieces, a hollow sound when tapped, repeated grout cracking, persistent mould, water stains, soft walls or movement underfoot. In shower areas and around baths, these signs can indicate a waterproofing problem.
If a shower wall tile is simply dated but solid, regrouting and resealing may be enough. If tiles move when pressed or grout fails repeatedly in the same place, do not cover the problem. Get professional advice before choosing new finishes.
Vanity: Keep the Plumbing Position, Upgrade the Storage
Keep the vanity if it is dry and sturdy
A structurally sound vanity is often worth saving, especially if it keeps the plumbing in the same position. Moving water supply and waste pipes usually adds cost, time and trade work.
If the cabinet carcass is dry, the drawers work and the top is in decent condition, consider a refresh rather than a replacement. New handles, a cleaner mirror, better internal storage and fresh wall paint can make an older vanity look deliberate rather than dated.
Refresh a dated vanity
Painting or refinishing a vanity can be a strong budget move, but only if the material can handle it. Solid wood and some painted cabinets are easier to refresh than peeling laminate or swollen particleboard.
- Change handles or knobs for a more current shape.
- Add drawer dividers, baskets or pull-out organisers.
- Replace a stained or dated basin waste if compatible.
- Update the mirror or medicine cabinet for a bigger visual change.
- Consider a new tap if the existing one leaks, feels stiff or looks badly worn.
Before buying a replacement tap or basin, check the existing hole drillings and plumbing setup. A single-hole mixer, three-hole tap set, wall-mounted spout and basin-mounted spout are not automatically interchangeable. You may need a cover plate, a new countertop or a plumber, which can change the cost quickly.
Replace the vanity when water damage is present
A vanity with swollen sides, a warped base, peeling laminate near the basin, mouldy smells or sagging drawers is usually not worth saving. Replace it after the leak or moisture source has been fixed.
When choosing a replacement, prioritise moisture-resistant materials, useful storage and an easy-clean surface over a dramatic design. A simple vanity that works every morning is a better investment than one that looks striking but leaves you with nowhere to put toiletries.
Fixtures: Spend Where You Touch Them Every Day
Keep what still works well
Not every fixture needs to match perfectly. A plain chrome towel rail, a simple toilet roll holder or a bath spout in good condition can often stay. Mixing finishes can work if it looks intentional, but too many metals in a small bathroom can feel busy.
Refresh with small, high-impact swaps
Fixtures are where a small budget can go a long way. A new showerhead, tap, robe hooks, cabinet pulls or toilet seat can make the room feel cleaner and more current without changing the structure.
If you live in an area with hard water, consider finishes that are easier to maintain. Very dark or very shiny finishes can show water spots more readily, while brushed finishes may be more forgiving. Availability and performance vary by brand, so check care instructions before buying.
Replace fixtures when performance is poor
Leaking taps, corroded fittings, stiff handles and weak showerheads are not just aesthetic issues. They affect daily use. Spend a little more on taps, shower controls and valves if you can, because these are used constantly and can be inconvenient to repair later.
Check compatibility before purchasing, especially in older homes. Plumbing standards, pressure systems and fitting sizes can vary between the US, UK, Canada and Australia, and even by region or property age.
Lighting: Do Not Treat It as an Afterthought
Keep lighting if it is safe and suitable for bathrooms
Good lighting can make modest materials look more expensive. Poor lighting can make new finishes look flat. If your existing lighting is safe, bright enough and correctly rated for bathroom use, it may be fine to keep.
Bathroom lighting must be suitable for damp or wet areas. The rules for zones, fixture ratings and who is allowed to do the work vary by country and region, so if you are unsure, ask a qualified electrician.
Refresh with better bulbs and layers of light
Sometimes the simplest improvement is changing bulbs, where the fixture allows it. Choose light that is flattering but practical for grooming. A warm-to-neutral tone usually feels more comfortable than very cold light, but the right choice depends on the room and your preference.
If the bathroom relies on one overhead light, the mirror area may still be shadowy. Task lighting near the mirror can make shaving, skincare and makeup easier. Even a low-spend renovation feels more polished when the lighting is planned.
Replace unsafe or poorly placed lighting professionally
Flickering fittings, damaged lights, non-rated fixtures or badly placed lighting should be assessed. Electrical work in bathrooms is tightly regulated in many places because water and electricity are a serious safety risk.
Use a qualified electrician for installing or moving lights, adding outlets, fitting extractor fans, wiring heated towel rails or installing underfloor heating. In the UK, bathroom electrical work may fall under Part P building regulations. In Australia, electrical work must generally be carried out by a licensed electrician. In the US and Canada, permit and code requirements vary by state, province and municipality. Check your local authority before any work begins.
For general safety guidance, see organisations such as Electrical Safety Foundation International in the US, Electrical Safety First in the UK, and your local government building or licensing authority.
Grout and Caulk: The Budget Detail That Changes Everything
Keep grout if it is intact
If grout is mostly sound and only lightly discoloured, cleaning may be enough. Avoid harsh scrubbing tools or unsuitable chemicals that can damage tile, stone or sealants.
Refresh grout and caulk for a cleaner look
Fresh grout and caulk can make old tile look dramatically newer. Regrouting is more work than many people expect, but it is often far less disruptive than replacing tile.
- Regrout areas where the grout is stained, uneven or beginning to crumble.
- Use grout colourants or pens only on sound grout, not as a fix for failing grout.
- Remove and replace peeling or mouldy caulk with bathroom-grade sealant.
- Seal grout where appropriate, depending on the tile and grout type.
Grout colourants or sealers can work well on sound, porous grout lines when you want to shift a dirty beige or grey back to a cleaner white, charcoal or neutral shade. They are not a repair product. If the grout is crumbling, damp, silicone-contaminated or already sealed in a way that prevents bonding, colourants may peel or look patchy.
White subway tile with greyed grout can look tired even if the tile itself is fine. Cleaning, regrouting and fresh silicone around the bath can make the whole room feel cared for.
Investigate if damage keeps returning
Crumbling grout, recurring mould, damp smells or movement may signal water intrusion. Wet zones need more caution than decorative splash areas. If you suspect moisture behind tile, bring in a professional before covering it up.
Budget Bathroom Renovation: What to DIY vs What to Call Out
DIY can save money, but only when the job is suitable for your skill level and the risk is low. Cosmetic work is often DIY-friendly. Work involving water supply, drainage, wiring or waterproofing is much more likely to require a licensed trade, and in some places it is legally restricted.
Safer DIY jobs for confident beginners
- Painting walls and ceilings with bathroom-suitable paint.
- Replacing cabinet handles or knobs.
- Adding drawer organisers, baskets or freestanding storage.
- Deep cleaning tile and grout.
- Replacing a toilet seat, where local rules allow.
- Installing hooks, shelves or towel bars, after checking for hidden pipes or wires.
- Replacing shower curtains, blinds, towels and bath mats.
- Removing and replacing caulk in a dry, sound area if you are comfortable doing it properly.
DIY jobs for intermediate renovators
- Painting or refinishing a vanity.
- Replacing a mirror, if there is no wiring involved and the wall can support it.
- Regrouting a small non-structural area.
- Fitting simple accessories with the correct anchors.
Peel-and-stick floor tiles can be an interim cosmetic fix, but they are not ideal for every bathroom. Water can creep under edges and trap moisture, especially near baths and showers. If you use them, keep them to a low-moisture powder room or a very well-ventilated area where standing water is unlikely, and understand that they may not be a long-term surface.
DIY jobs to approach with caution
Be cautious with tile removal in wet areas, heavy wall-mounted vanities, shower walls, structural flooring, layout changes and any job that exposes hidden damage. Older homes may also have materials such as asbestos-containing products, lead paint or outdated wiring. If you suspect these, stop and seek professional advice.
A smart weekend DIY plan might include painting the walls, changing handles, replacing the toilet seat if allowed locally, adding storage, cleaning grout and resealing around the basin. That can noticeably improve the room without touching plumbing or electrics.
What Needs a Qualified Plumber or Electrician
Call a plumber for water supply, drainage and leaks
Use a qualified plumber for moving pipes, changing the layout, installing or relocating toilets, showers, baths or basins, fixing hidden leaks, replacing valves or dealing with drainage issues. A small mistake can lead to water damage behind walls or under floors.
In Australia and in some other regions, plumbing work is often legally restricted to licensed professionals, even when a job looks small. In the UK, Canada and the US, rules vary by location and by type of work. Unpermitted or non-compliant work may also affect insurance or resale, so verify local requirements before touching a pipe.
Replacing a simple showerhead may be DIY-friendly in some places. Replacing the shower valve inside the wall is not the same job.
Call an electrician for bathroom electrical work
Use a qualified electrician for installing or moving lights, adding outlets, fitting extractor fans, installing heated towel rails, replacing unsafe fittings or doing any wiring near water.
Call a specialist for waterproofing and ventilation concerns
Persistent mould, damp smells, soft floors and failed shower waterproofing need more than cosmetic treatment. Ventilation is also essential. A bathroom that cannot clear steam properly will keep working against your renovation, no matter how nice the finishes are.
Where Spending More Actually Pays Off
A tight budget does not mean every choice should be the cheapest available. Spend more where failure would be expensive, disruptive or frustrating.
- Taps, shower controls and valves: They are used daily and can be annoying to replace later.
- Waterproofing: Hidden moisture damage is far worse than choosing a plain tile.
- Ventilation: A good extractor fan and proper airflow help protect paint, grout and cabinetry.
- Lighting safety and placement: Safe, well-positioned lighting improves the room every day.
- Hardworking surfaces: Flooring, vanity tops and shower areas must handle water, cleaning products and wear.
Save on items that are easy to change later: towels, art, cabinet handles, accessories, paint colour and some mirrors. If you want to try a trend, use it in a lower-risk piece rather than in permanent plumbing or tile.
A Simple Renovation Plan
Step 1: Inspect before you design
Look for leaks, loose tiles, mould, peeling caulk, poor ventilation, weak lighting, swollen cabinetry and damaged flooring. Take photos and measurements. Note what must stay because of budget, layout or plumbing constraints.
Step 2: Prioritise daily irritation
Ask what bothers you every morning. Is the mirror too dark? Is there nowhere to store skincare? Is the shower weak? Does the grout always look dirty? Fixing daily irritations often creates more satisfaction than changing a surface just because it is not your favourite colour.
Step 3: Choose a limited finish palette
Use two or three main finishes. For example, keep existing white tile, paint the walls a soft warm neutral, use brushed nickel fixtures and add natural wood storage. Repeating finishes makes a low-budget renovation feel calmer and more planned.
Step 4: Phase the work if needed
- Phase one: leaks, safety, ventilation and lighting.
- Phase two: vanity, fixtures, grout and caulk.
- Phase three: paint, storage, towels, mirror and styling.
Phasing helps you avoid spending the budget on pretty items before the practical problems are solved.
Step 5: Keep a contingency
Bathrooms often reveal hidden issues once work begins. If your budget is very tight, avoid unnecessary demolition until you understand the condition of the room. A contingency does not have to be large to be useful, but having some flexibility can prevent rushed decisions.
Costly Mistakes to Avoid
- Replacing tile only because the colour is dated, when it could be refreshed.
- Moving plumbing for a minor layout preference.
- Buying taps, vanities or lights before checking compatibility.
- Ignoring ventilation and then battling mould or peeling paint.
- Using paint, timber or sealants not suited to bathrooms.
- Covering mould or damp without finding the cause.
- Spending heavily on decorative trends while keeping poor lighting.
- Underestimating the mess and skill involved in tile removal.
- Mixing too many finishes in a small room.
- Doing plumbing or electrical work without the right qualifications or permits.
One common example: replacing the vanity and mirror while leaving a weak extractor fan and shadowy light. The room looks better briefly, but the same condensation and poor visibility remain. Function should lead; style should support it.
Quick Keep, Refresh or Replace Checklist
Keep
- Solid neutral tiles.
- A dry, sturdy vanity.
- A working toilet or bath in good condition.
- Safe, bathroom-rated lighting.
- Functional fixtures that still perform well.
- A layout that works and avoids moving plumbing.
Refresh
- Grout and caulk.
- Cabinet handles.
- Wall and ceiling paint.
- Mirror or medicine cabinet.
- Showerhead, where local rules allow DIY replacement.
- Toilet seat.
- Storage, towels and accessories.
Replace
- Leaking taps, valves or pipework.
- Swollen or mouldy vanity units.
- Loose or cracked tiles in wet areas.
- Unsafe or unsuitable lighting.
- Poor ventilation.
- Damaged flooring.
- Anything affected by water intrusion.
FAQ
What is the cheapest way to renovate a bathroom?
The cheapest sensible approach is to keep the existing layout, avoid moving plumbing, clean or regrout tile, repaint walls, update hardware, improve storage and refresh lighting where safe. Fix leaks, ventilation and failed sealant first so the cosmetic improvements last.
Can I renovate a bathroom myself?
You can DIY many cosmetic jobs, such as painting, changing handles, deep cleaning grout, adding storage and replacing soft furnishings. Plumbing, electrical work, waterproofing and hidden leak repairs usually need qualified professionals and may legally require licensed trades. Requirements vary by location, so check local rules before starting.
Should I replace bathroom tiles on a budget?
Not always. If tiles are firmly attached, waterproof and in reasonable condition, refreshing grout, caulk, paint and fixtures may be enough. Replace or investigate tiles that are loose, cracked, moving, repeatedly mouldy or allowing water behind them.
Where should I spend more in a small bathroom update?
Spend more on waterproofing, ventilation, safe lighting, taps, shower controls and durable surfaces. These affect daily use and can be costly to correct later. Save on easy-to-change items such as towels, hooks, handles, decorative accessories and paint colour.
Is it worth replacing a bathroom vanity?
Replace a vanity if it is swollen, mouldy, sagging, warped or damaged by water. If it is dry and sturdy, you may get a strong result by painting it, changing the handles, improving internal storage, updating the mirror or replacing the tap.
Conclusion: Make Your Budget Bathroom Renovation Work Harder
A successful budget bathroom renovation is not about doing the least possible or buying the cheapest version of everything. It is about knowing what deserves to stay, what can be refreshed and what must be replaced for safety, durability and daily comfort.
Keep the layout if it works. Refresh sound surfaces before tearing them out. Replace anything leaking, unsafe or water-damaged. DIY the cosmetic jobs you can do well and are allowed to do locally, and bring in qualified professionals for plumbing, electrics, waterproofing and serious moisture issues. That balance is what makes a modest bathroom renovation feel considered, practical and built to last.





Join the conversation
Sign in — Sign in to join the conversation.